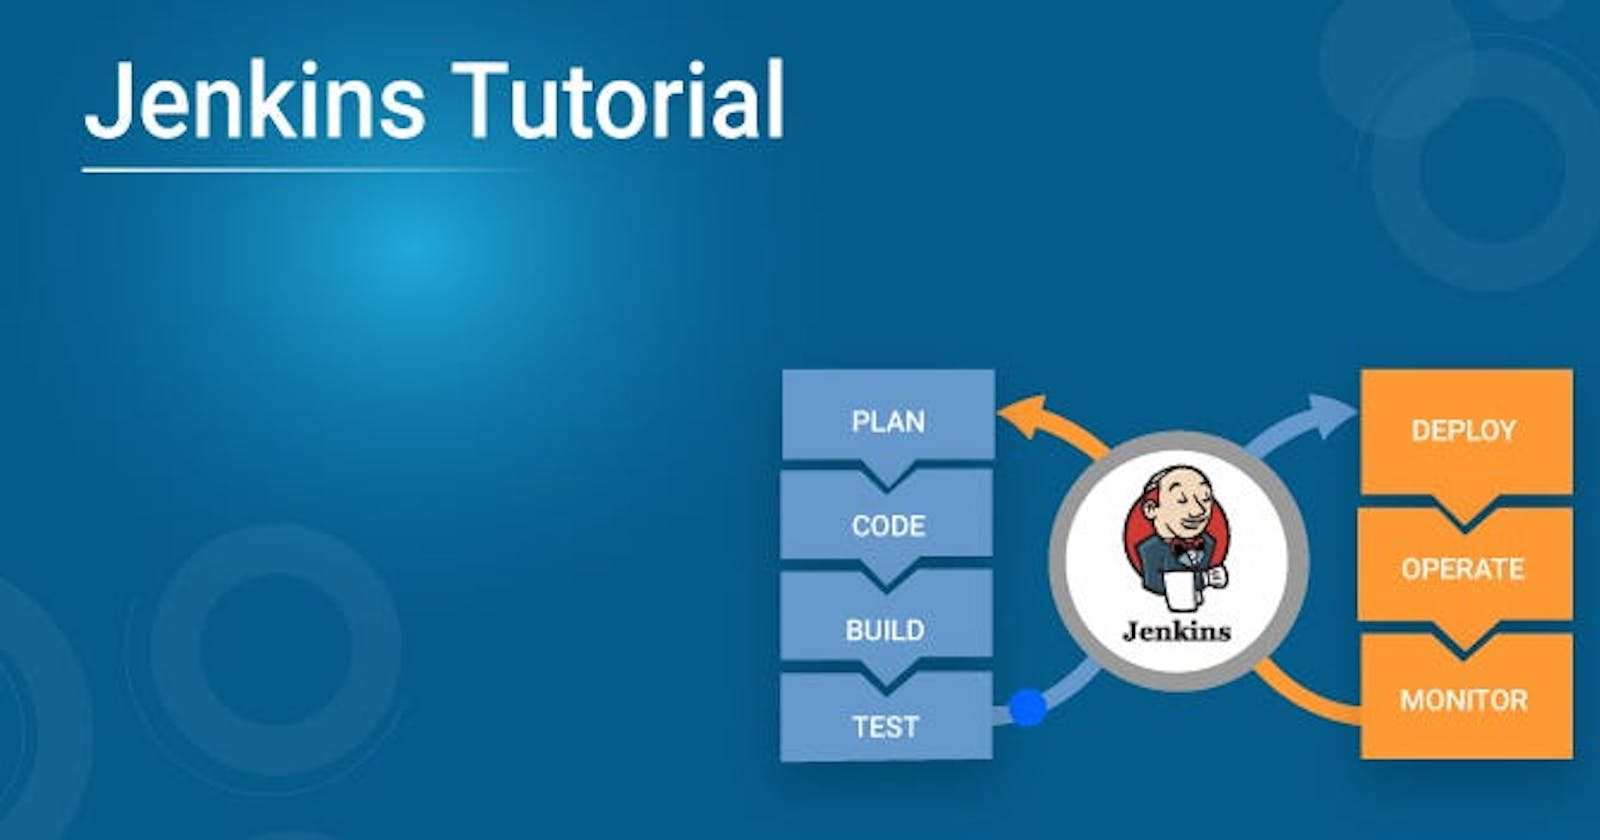
What is Jenkins?
Jenkins is an open-source automation server used for building, testing, and deploying software applications. It is a popular tool among developers and DevOps teams for automating software development processes, such as continuous integration and continuous delivery (CI/CD).
Why we used Jenkins?
Jenkins is used to automating software development processes, such as continuous integration and continuous delivery (CI/CD), which helps to save time, reduce errors, streamline development processes, and ensure that applications are deployed quickly and reliably.
Advantages of Jenkins
Continuous Integration: Jenkins can be used to perform continuous integration, which means that it can automatically build, test, and deploy code changes as soon as they are committed to the code repository. This helps to detect and fix errors early in the development process.
Extensibility: Jenkins has a large number of plugins that can be used to extend its functionality. These plugins can be used to integrate Jenkins with other tools and services, such as GitHub, AWS, and Docker.
Easy Configuration: Jenkins has a simple and easy-to-use web-based interface that allows users to configure and manage their build and deployment processes.
Scalability: Jenkins can be easily scaled up or down to accommodate changing requirements. It can be run on a single machine or distributed across multiple machines to handle large and complex projects.
Open Source: Jenkins is an open-source tool, which means that it is free to use and can be customized to meet specific requirements.
Community Support: Jenkins has a large and active community of users and developers who contribute to its development and provide support to users. This community provides access to a wealth of knowledge and resources that can be used to solve problems and learn new skills.
Disadvantages of Jenkins
All plug-ins are not compatible with the declarative pipeline syntax.
Jenkins has many plug-ins in its library, but it seems like they are not maintained by the developer team from time to time. This is when it becomes very important that whatever plug-ins you are going to use; are getting a regular update or not.
Lots of plug-ins have a problem with the updating process.
It is dependent on plug-ins; sometimes, you can't find even basic things without plug-ins.
Jenkins UI is not user-friendly in comparison to current UI Technologies. It cannot be very clear for the first-time user.
Managing of Jenkins dashboard is hard when we have too many jobs to be executed.
What is a pipeline?
The pipeline is like a step-by-step process to doing anything.
the pipeline is used the process is called first come first served(FCFS).
What is CI/CD?
CICD stands for continuous integration continuous delivery or deployment.
CI/CD is not a tool it is a methodology.
it is a methodology of SDLC(software development life-cycle)
This is the process of developing any software The advantage we have with this process is that things are automated. If there is any mistake, it will be caught in advance. we don't have to go any further.
What is CI/CD pipeline
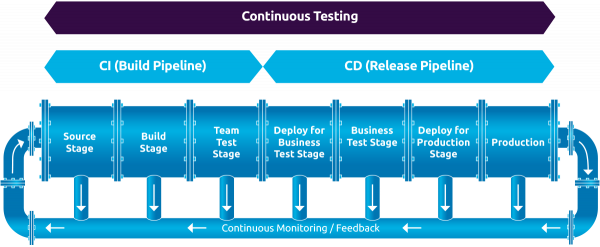
CI/CD (Continuous Integration/Continuous Deployment) pipeline is a set of automated processes that enable developers to quickly and efficiently build, test, and deploy their software applications.
The pipeline typically consists of several stages, including:
Code changes are made and pushed to a version control system, like GitHub.
A build server automatically fetches the code, compiles it, and packages it into a deployable artefact.
Automated tests are run against the artefact to ensure it meets the quality standards set by the development team.
If the tests pass, the artefact is deployed to a staging environment for further testing.
Once the staging tests pass, the artefact is deployed to production.
By automating these processes, developers can catch errors early in the development cycle, reduce the time it takes to deliver software updates and ensure a higher level of quality in the final product.
Why CI/CD is used? why it is popular in the market?
CI/CD is used for several reasons:
Faster delivery of software updates: With CI/CD, developers can quickly and easily push out updates to their applications, reducing the time it takes to deliver new features or fix bugs.
Improved software quality: By running automated tests at every stage of the pipeline, developers can catch errors early in the development cycle, reducing the likelihood of bugs and issues making it to production.
Increased efficiency: Automation reduces the need for manual tasks, freeing up developers' time to focus on more high-value tasks.
Better collaboration: CI/CD encourages collaboration between developers, testers, and operations teams, enabling faster feedback loops and better communication.
CI/CD is popular in the market because it enables companies to deliver software updates faster, with higher quality, and at a lower cost. This, in turn, helps businesses stay competitive and respond quickly to changing market conditions. Additionally, as software becomes an increasingly critical part of many businesses, the need for a reliable and efficient development pipeline has only grown, making CI/CD an essential tool for modern software development.
Note :
Continuous Integration = continuous build + continuous testing
bugs = error
job = task = item
what is the difference between deployment and delivery
Deployment and delivery are two different steps in the software development process.
Delivery refers to the act of delivering the software to the customer or end-user. This includes packaging the software, testing it, and making it available for download or installation. Delivery ensures that the software is ready to be used by the end-user.
Deployment, on the other hand, refers to the act of installing and configuring the software on the production environment. This includes setting up servers, installing dependencies, and configuring the software to run in a production environment. Deployment ensures that the software is running correctly and efficiently on the production environment.
In short, delivery is the process of making the software available to the customer or end-user, and deployment is the process of getting the software up and running in the production environment. Both are important steps in the software development process, and they need to be done correctly to ensure a successful software release.
what are plugins?
Plugging is the word used to connect something.
Some examples of popular Jenkins plugins include the Git plugin, which allows Jenkins to integrate with Git version control systems, the Maven plugin, which adds support for the Maven build tool, and the Docker plugin, which provides integration with Docker containers.
Do you run Jenkins on a dedicated server?
yes
Linked Project:
A linked project is simply nothing, it is something that when one project completes, another project starts.
it is of two types:
upstream linked project
An upstream-linked project is something where one task gets completed and another automatically starts.
example: here will be the first big active
Here you will put the information on post-build action may the second job inside the first job.
- Downstream linked project
Both are the same but one difference is here will be the second big active.
Here you will enter the information of the first job by going to the post-build action inside the second job.
How to Install Jenkins on AWS
step - 1 Update your system
sudo apt update
Install java:
sudo apt install openjdk-11-jre
Validate Installation java
-version
Step - 2 Install Jenkins
curl -fsSL https://pkg.jenkins.io/debian/jenkins.io.key | sudo tee \ /usr/share/keyrings/jenkins-keyring.asc > /dev/null
echo deb [signed-by=/usr/share/keyrings/jenkins-keyring.asc] \ https://pkg.jenkins.io/debian binary/ | sudo tee \ /etc/apt/sources.list.d/jenkins.list > /dev/null
sudo apt-get update
sudo apt-get install jenkins
Step -3 Start jenkins
sudo systemctl enable jenkins
sudo systemctl start jenkins
sudo systemctl status jenkins
Step - 4
Open port 8080 from AWS Console
(Freestyle project)
Jenkins pipeline:
Jenkins pipeline is a powerful feature in Jenkins that allows users to define their entire build process as a code script, which can be version-controlled, tested, and reused across multiple projects.
Here's an example of a simple Jenkins pipeline:
pipeline {
    agent any

    stages {
        stage('Build') {
            steps {
                sh 'npm install'
                sh 'npm run build'
            }
        }

        stage('Test') {
            steps {
                sh 'npm run test'
            }
        }

        stage('Deploy') {
            steps {
                sh 'npm run deploy'
            }
        }
    }
}
In this example, the pipeline has three stages: Build, Test, and Deploy. The agent any directive indicates that the pipeline can run on any available agent.
In the Build stage, the pipeline runs two shell commands: npm install and npm run build. These commands install any required dependencies and build the project.
In the Test stage, the pipeline runs the command npm run test to execute the project's test suite.
In the Deploy stage, the pipeline runs the command npm run deploy to deploy the built project to a production environment.
Each stage can have multiple steps, and each step is essentially a shell command that is executed by the pipeline.
This pipeline is just a simple example, but the Jenkins pipeline can be used to define more complex workflows that include parallel execution, conditional logic, and error handling.
parallel execution:
Parallel execution in the Jenkins pipeline is a feature that allows users to run multiple stages or steps at the same time, which can speed up the overall build process.
Here's an example of a Jenkins pipeline with parallel execution:
pipeline {
    agent any

    stages {
        stage('Build') {
            steps {
                sh 'npm install'
                sh 'npm run build'
            }
        }

        stage('Test') {
            parallel {
                stage('Unit Tests') {
                    steps {
                        sh 'npm run unit-test'
                    }
                }
                stage('Integration Tests') {
                    steps {
                        sh 'npm run integration-test'
                    }
                }
            }
        }

        stage('Deploy') {
            steps {
                sh 'npm run deploy'
            }
        }
    }
}
In this example, the pipeline has three stages: Build, Test, and Deploy. The Test stage has two parallel stages: Unit Tests and Integration Tests.
When the pipeline runs, the Build stage runs first, followed by both Unit Tests and Integration Tests stages running in parallel. Once both parallel stages are completed, the pipeline moves on to the Deploy stage.
The parallel directive allows users to define multiple stages or steps that can be executed simultaneously. This can help reduce the overall build time by running tasks in parallel instead of waiting for one task to finish before starting the next one.
Note that the parallel directive can be nested inside other directives, allowing for even more complex parallel execution workflows to be defined.
Conditional logic :
Conditional logic in the Jenkins pipeline allows you to specify certain actions to be taken only if a certain condition is met. This can be very useful for controlling the flow of your pipeline based on certain criteria.
Here's an example of using conditional logic in a Jenkins pipeline:
pipeline {
    agent any

    stages {
        stage('Build') {
            steps {
                sh 'npm install'
                sh 'npm run build'
            }
        }

        stage('Test') {
            steps {
                sh 'npm run test'
            }
            post {
                always {
                    junit 'test-results/**/*.xml'
                }
                success {
                    echo 'All tests passed!'
                }
                failure {
                    echo 'Some tests failed.'
                }
            }
        }

        stage('Deploy') {
            when {
                branch 'master'
            }
            steps {
                sh 'npm run deploy'
            }
        }
    }
}
In this example, we have a pipeline with three stages: Build, Test, and Deploy.
In the Test stage, we have defined some post-actions that should be executed after the test step completes. We have specified three conditions using the success, failure, and always keywords. The success block will be executed only if all tests pass, and the failure block will be executed only if some tests fail. The always block will be executed regardless of whether the test stage succeeds or fails.
In the Deploy stage, we have used the when directive to specify a condition that must be met before the stage can be executed. In this case, the stage will only be executed if the branch being built is master.
Using conditional logic in Jenkins pipeline can help you to make your build process more flexible and adaptable to different scenarios. You can use conditions to run different steps or post-actions based on the outcome of previous steps, the environment in which the pipeline is being run, or any other criteria that you choose to specify.
Error handling:
Error handling in the Jenkins pipeline involves handling errors that occur during the execution of the pipeline and taking appropriate actions based on the nature of the error.
Here's an example of how error handling can be implemented in a Jenkins pipeline:
pipeline {
    agent any

    stages {
        stage('Build') {
            steps {
                sh 'npm install'
                sh 'npm run build'
            }
            post {
                always {
                    sh 'npm run cleanup'
                }
                success {
                    sh 'echo "Build successful"'
                }
                failure {
                    sh 'echo "Build failed"'
                }
            }
        }

        stage('Test') {
            steps {
                sh 'npm run test'
            }
            post {
                always {
                    sh 'npm run cleanup'
                }
                success {
                    sh 'echo "Tests passed"'
                }
                failure {
                    sh 'echo "Tests failed"'
                }
            }
        }

        stage('Deploy') {
            steps {
                sh 'npm run deploy'
            }
            post {
                always {
                    sh 'npm run cleanup'
                }
                success {
                    sh 'echo "Deployment successful"'
                }
                failure {
                    sh 'echo "Deployment failed"'
                }
            }
        }
    }
}
In this example, the post section is used to define actions that should be taken after the completion of each stage.
The always block contains actions that are executed regardless of whether the stage succeeded or failed. In this case, the npm run cleanup command is executed to ensure that any temporary files or resources created during the stage are cleaned up.
The success block contains actions that are executed only if the stage completes successfully. In this case, the echo "Build successful" command is executed to indicate that the build was successful.
The failure block contains actions that are executed only if the stage fails. In this case, the echo "Build failed" command is executed to indicate that the build failed.
By including these post blocks in each stage, the pipeline can handle errors and take appropriate actions based on the outcome of each stage. This helps to ensure that the pipeline can recover from failures and continue to execute as intended.
what is the difference between continuous delivery and deployment?
Continuous Delivery (CD) and Continuous Deployment (CD) are two related but distinct terms used in the software development process.
Continuous Delivery (CD) is the practice of automatically building, testing and deploying software changes to production environments. This means that software changes are continuously delivered to a staging environment, where automated tests are performed to ensure that the software works as expected. Once these tests have been passed, the changes are released to production. The key point to note here is that the production release is a manual step and requires human intervention.
For example, let's consider a software development team that is working on an e-commerce website. With continuous delivery, when a new feature is developed, it is automatically tested and delivered to a staging environment. In this environment, the team can perform additional tests, such as integration and acceptance tests, to ensure that the feature works correctly. Once the feature has been thoroughly tested and validated, the team can choose to manually release it to the production environment.
On the other hand, Continuous Deployment (CD) is a practice in which every change that passes the automated testing phase is automatically deployed to production. This means that, unlike continuous delivery, there is no manual step involved in the release process.
For example, let's consider a software development team that is working on a mobile application. With continuous deployment, when a new feature is developed and passes all automated tests, it is automatically released to the production environment. This means that as soon as the feature is ready, it is available to all users of the application without any human intervention.
To summarize, continuous delivery is the practice of automatically building, testing, and delivering software changes to a staging environment, where a human makes the final decision to release the changes to production. Continuous deployment, on the other hand, is the practice of automatically deploying software changes to production without human intervention once the automated tests have passed.
What is Master/Slave Concept?
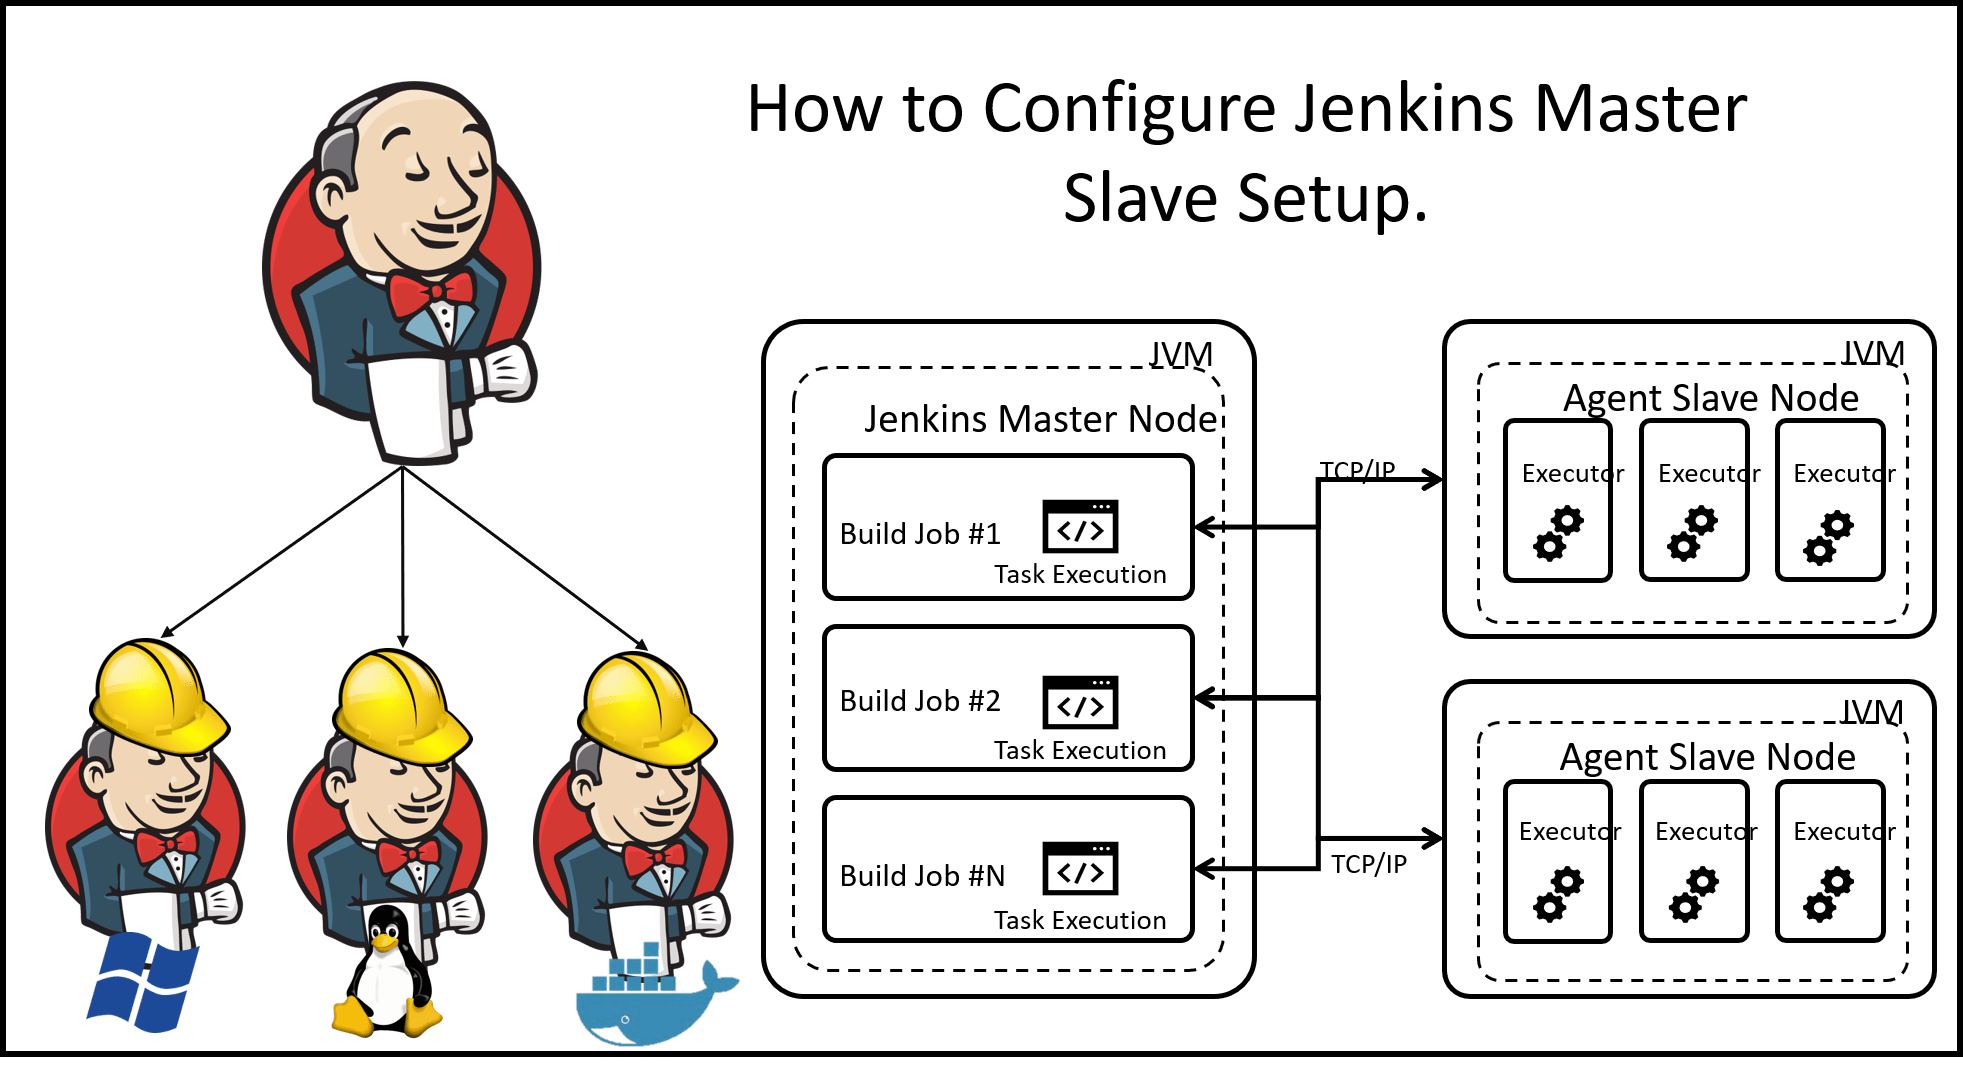
In Jenkins, the master/slave concept is used to distribute the workload and execute jobs on multiple machines called "slaves." The Jenkins master is responsible for managing and scheduling jobs, while the slaves are responsible for executing the actual build or deployment tasks.
Let's consider an example to understand this concept better. Imagine you have a large software project that requires building and testing on different platforms. You could have a Jenkins master server and multiple slave machines, each with a specific operating system or configuration.
By using the master/slave concept, you can distribute the workload across multiple machines, enabling parallel execution of tasks and improving the overall performance and scalability of your Jenkins setup.
In summary, the master/slave concept in Jenkins allows you to delegate job execution to multiple machines (slaves), with the master server coordinating and managing the process. This helps in scaling your build and test infrastructure and achieving faster and more efficient software development and deployment.
what are the works of the master node in Jenkins?
The master node in Jenkins is responsible for managing and coordinating the overall Jenkins system. Here are some of the key functions performed by the Jenkins master node, explained in easy and understandable language:
Job Management: The master node is where you create, configure, and manage Jenkins jobs. It provides a user-friendly interface to define the build steps, triggers, and post-build actions for your projects.
Scheduling and Execution: The master node schedules and assigns jobs to the available slave nodes based on their availability and matching criteria specified in the job configuration. It ensures that the jobs are executed promptly and coordinates the flow of work across the Jenkins environment.
User Interface and Reporting: The master node hosts the Jenkins user interface (UI) that allows users to interact with Jenkins. It provides a web-based dashboard where you can view the status of jobs, monitor build logs, and access various reports and metrics related to your projects.
Plugin Management: Jenkins has a rich ecosystem of plugins that extend its functionality. The master node is responsible for managing these plugins, including installation, configuration, and updates. It enables you to add new features and integrations to Jenkins without having to modify the core system.
Distributed Builds: If you have multiple slave nodes, the master node coordinates the distribution of build tasks across them. It breaks down a job into smaller units of work and assigns them to different slaves, allowing for parallel execution and faster build times.
Security and Access Control: The master node handles user authentication and authorization, ensuring that only authorized users can access and perform actions in Jenkins. It also manages security configurations, such as SSL certificates and secure communication protocols, to protect the Jenkins environment.
Plugin and System Configuration: The master node allows you to configure global settings for Jenkins, such as email notifications, source code management systems, and build environment variables. It provides a centralized location to manage the overall configuration of your Jenkins instance.
Integration and Extensibility: The master node serves as the central hub for integrating Jenkins with other tools and systems in your software development workflow. It supports various integrations through plugins and provides APIs for interacting with Jenkins programmatically.
In simple terms, the master node is like the brain of Jenkins. It handles the management, coordination, and control of all the build and deployment activities happening within Jenkins.
what are the works of the slave node in Jenkins?
The slave nodes in Jenkins play a crucial role in executing the actual build or deployment tasks. Here are the key functions performed by the Jenkins slave nodes, explained in easy and understandable language:
Job Execution: When a job is scheduled or triggered on the Jenkins master node, it delegates the execution of the job to an available slave node. The slave node receives the instructions from the master and performs the build or deployment tasks specified in the job configuration.
Parallel Execution: Jenkins slave nodes enable parallel execution of jobs. If you have multiple slave nodes, the master can distribute the workload across them, allowing multiple jobs to be executed simultaneously. This helps in improving the overall efficiency and speed of your build process.
Hardware/OS Specific Tasks: Slave nodes can be configured with specific hardware or operating systems to handle tasks that require a particular environment. For example, if you need to build and test your software on different platforms, you can set up slave nodes with different operating systems, such as Windows, Linux, or macOS, to handle platform-specific builds.
Scaling the Build Infrastructure: By adding more slave nodes to your Jenkins setup, you can scale your build infrastructure. This allows you to handle larger workloads, distribute the build tasks, and reduce the time it takes to complete builds. Slave nodes can be added or removed based on demand, providing flexibility in resource allocation.
Resource Specialization: Slave nodes can be specialized to handle specific types of tasks or configurations. For example, you can have slave nodes with more memory or processing power to handle resource-intensive builds, or you can dedicate slave nodes for tasks like code analysis or deployment to specific environments.
Distributed Testing: If you have a large test suite, you can distribute the tests across multiple slave nodes to execute them in parallel. This helps in reducing the overall test execution time and provides faster feedback on the quality of your software.
Agent Connectivity: Slave nodes establish a connection with the Jenkins master and wait for instructions. They regularly communicate with the master to provide updates on job status, log files, and other information related to the job execution.
In simple terms, slave nodes in Jenkins are like the hands that perform the actual work. They execute the build or deployment tasks delegated by the master node, enable parallel execution, and provide the necessary resources and specialized environments to handle specific types of tasks. By leveraging multiple slave nodes, you can distribute the workload, scale your build infrastructure, and achieve faster and more efficient software development and testing processes.
Advantages of the master-slave concept:
Scalability: The master/slave concept allows you to scale your Jenkins infrastructure by adding multiple slave nodes. This enables you to distribute the workload across multiple machines and handle larger workloads without overwhelming the Jenkins master. Scalability helps improve the overall performance and responsiveness of your Jenkins environment.
Parallel Execution: With multiple slave nodes, Jenkins can execute jobs in parallel. Each slave node can handle a separate job or a part of a job simultaneously, reducing the overall build or deployment time. Parallel execution improves productivity, enables faster feedback, and helps you deliver software more quickly.
Resource Optimization: By using slave nodes, you can optimize the utilization of resources in your build environment. You can assign specific slave nodes with particular hardware configurations or operating systems to handle specialized tasks or environments. This ensures that the right resources are utilized for each job, improving efficiency and reducing resource wastage.
Fault Tolerance: The master/slave setup in Jenkins enhances fault tolerance. If a slave node fails or experiences issues, the master can redistribute the job to another available slave. This ensures that the build or deployment process continues uninterrupted, even if individual slave nodes encounter problems. Fault tolerance helps maintain the stability and reliability of your CI/CD pipeline.
Flexibility and Customization: The master/slave concept provides flexibility and customization options. You can configure and customize each slave node with specific labels, capabilities, and configurations. This allows you to tailor the execution environment for different types of jobs or tasks. It also enables you to easily add or remove slave nodes based on your changing requirements or workloads.
In summary, the master/slave concept in Jenkins offers scalability, parallel execution, resource optimization, fault tolerance, and flexibility. By leveraging multiple slave nodes, you can handle larger workloads, execute jobs in parallel, make efficient use of resources, maintain system stability, and customize the execution environment to meet your specific needs.
(Hands-On):
step 1
create an agent instance

step 2
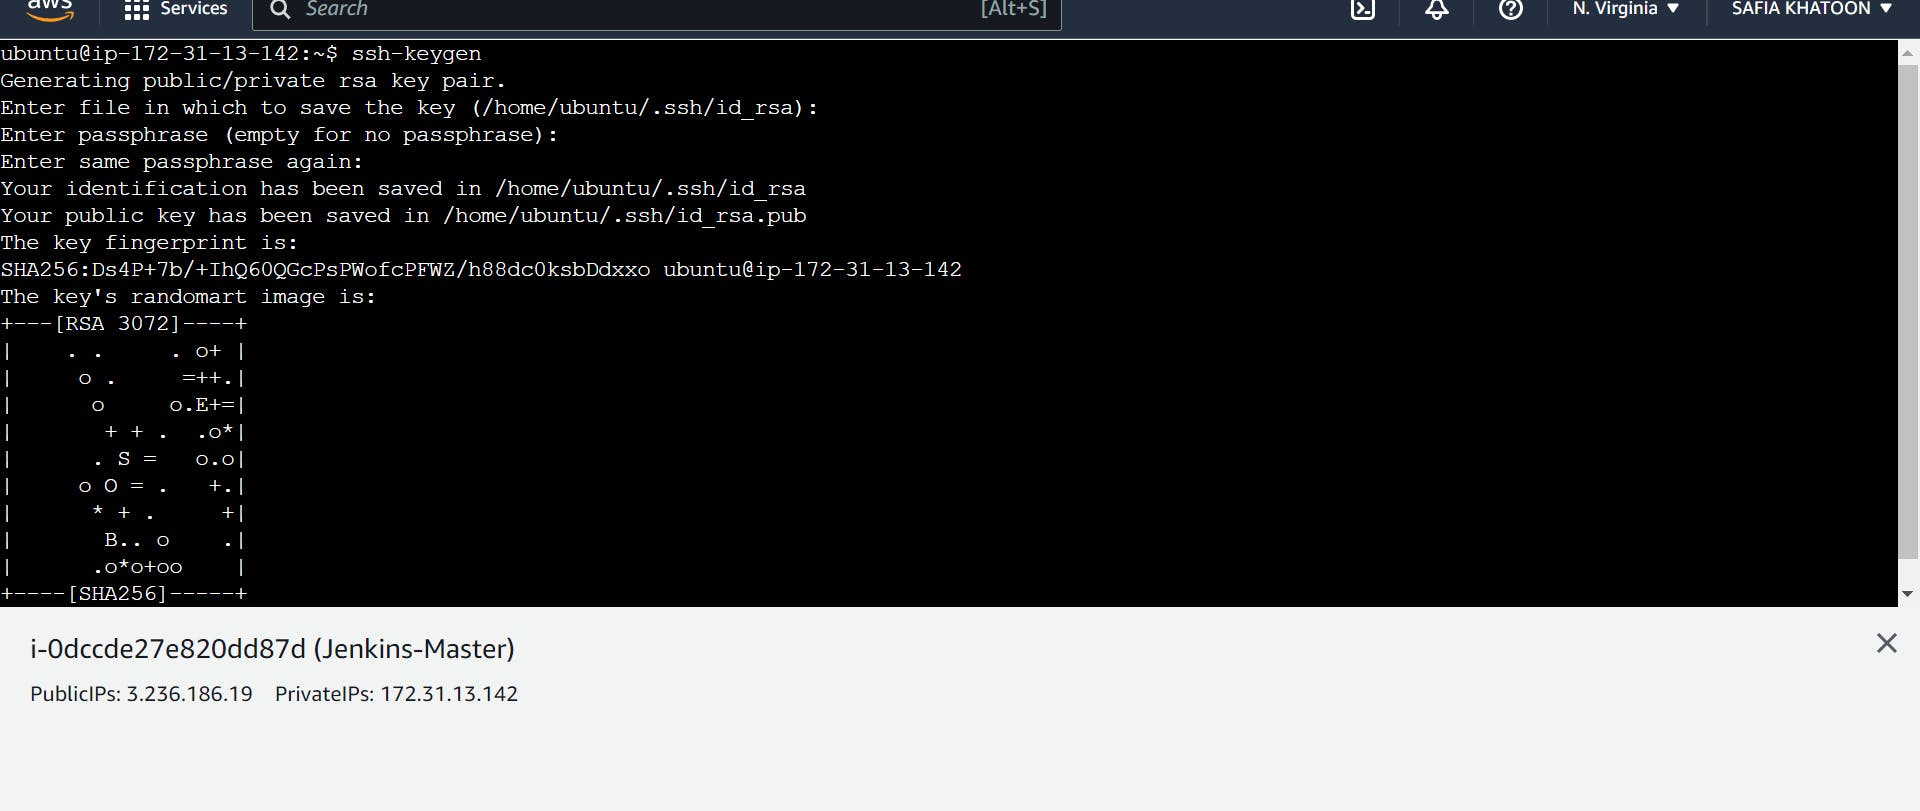
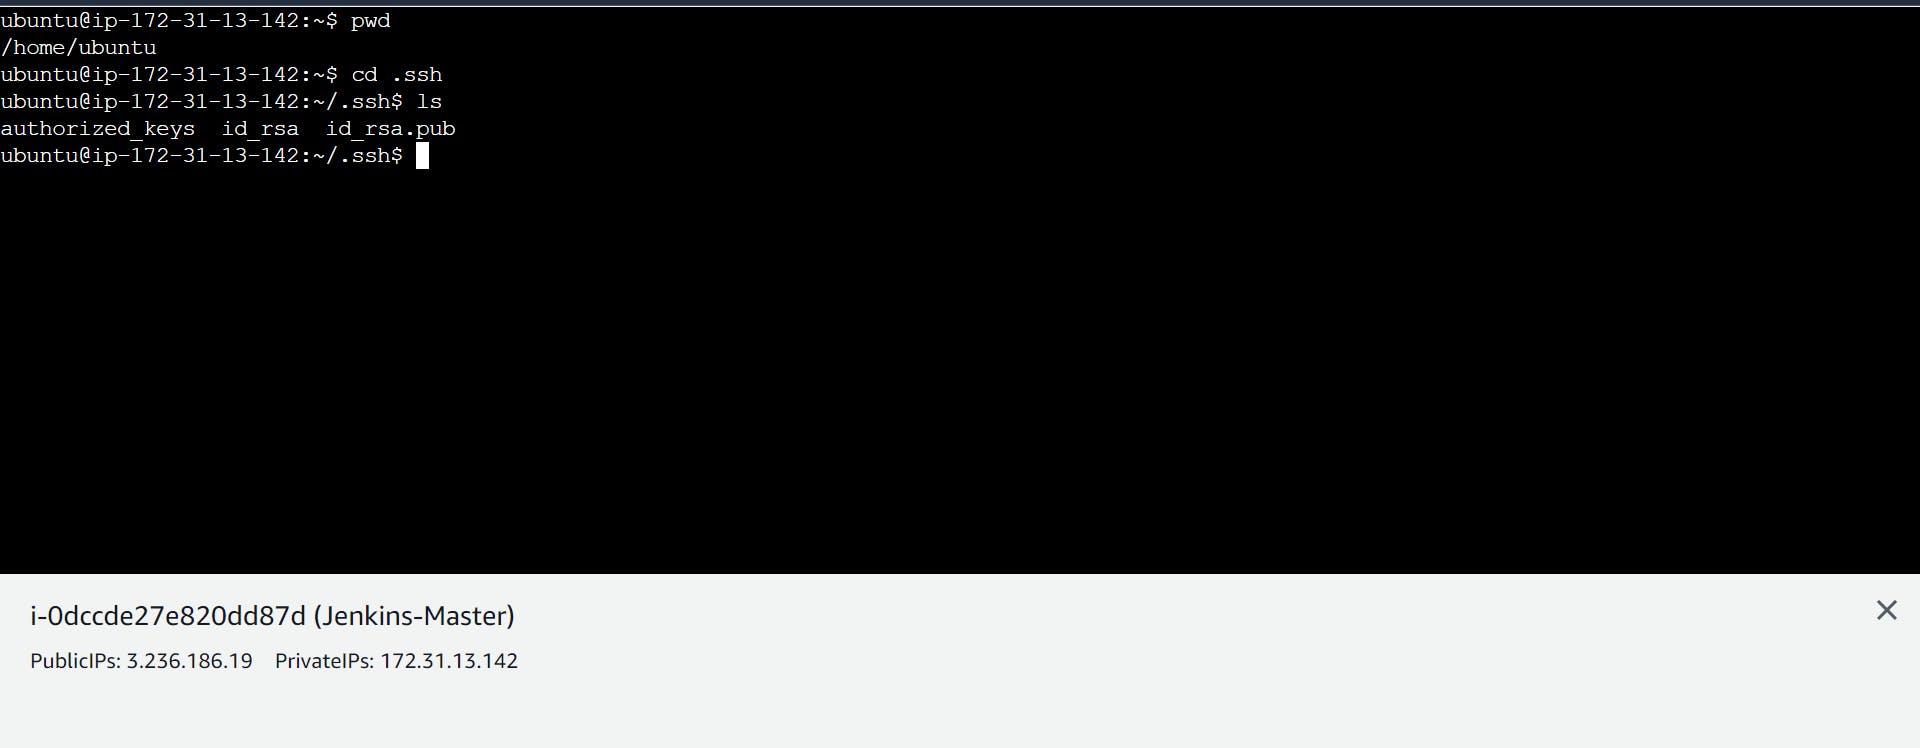
Go in Master
Generate SSH key
step 3
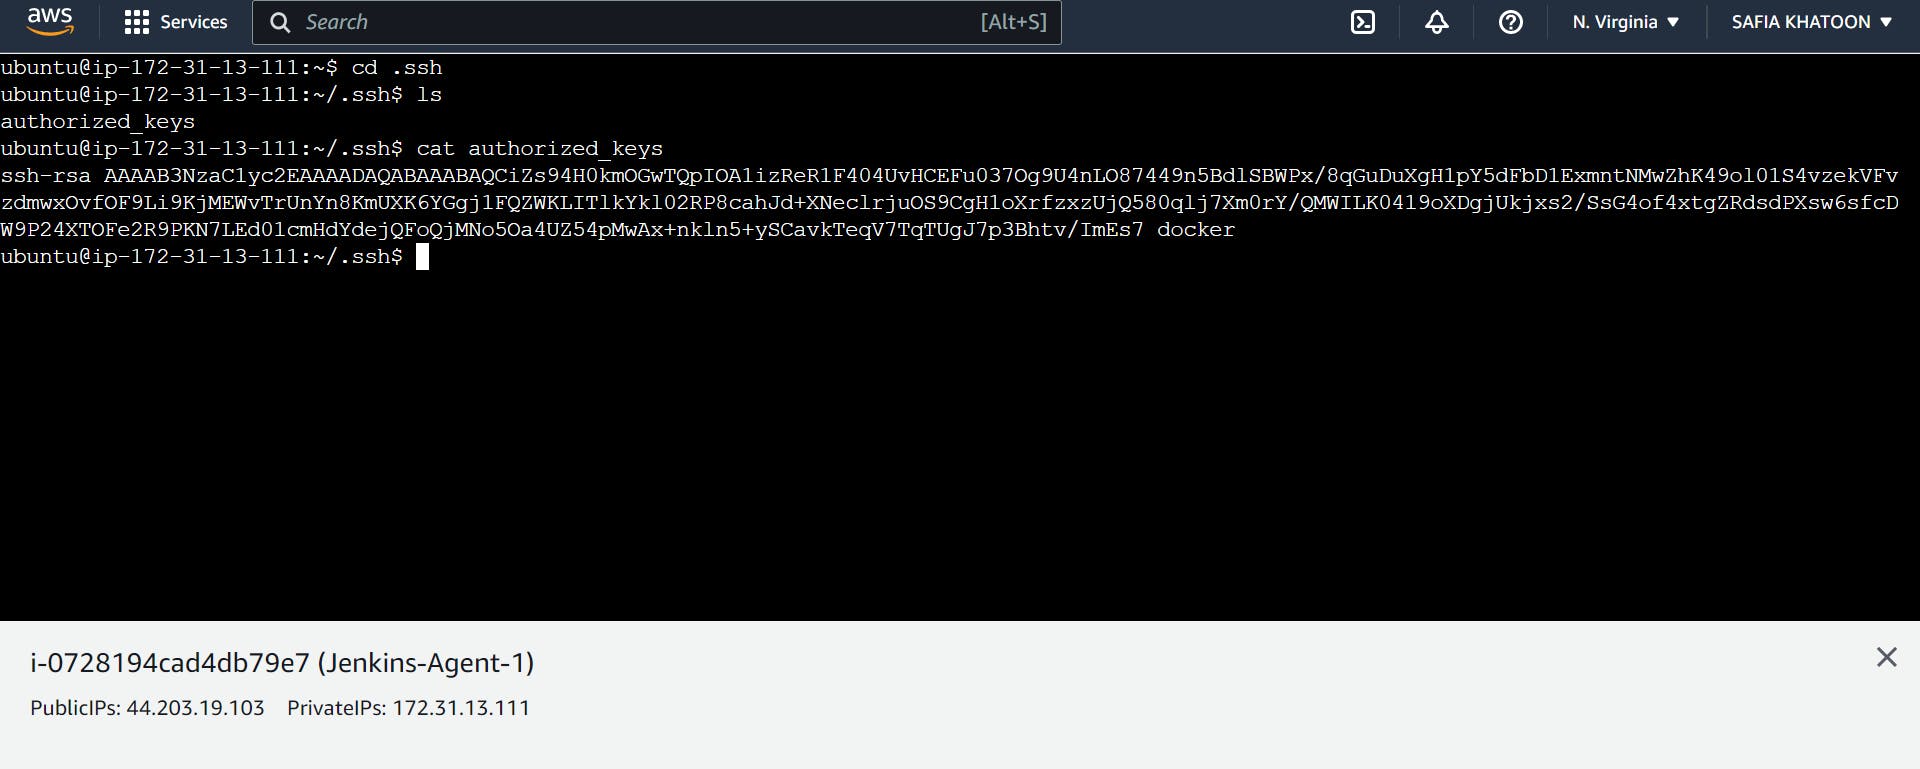
Go to Agent -1
step 4
Go to Mater
copy this pub key and paste the key in Jenkins -Agent -1

step 5
Go to Jenkins-Agent-1

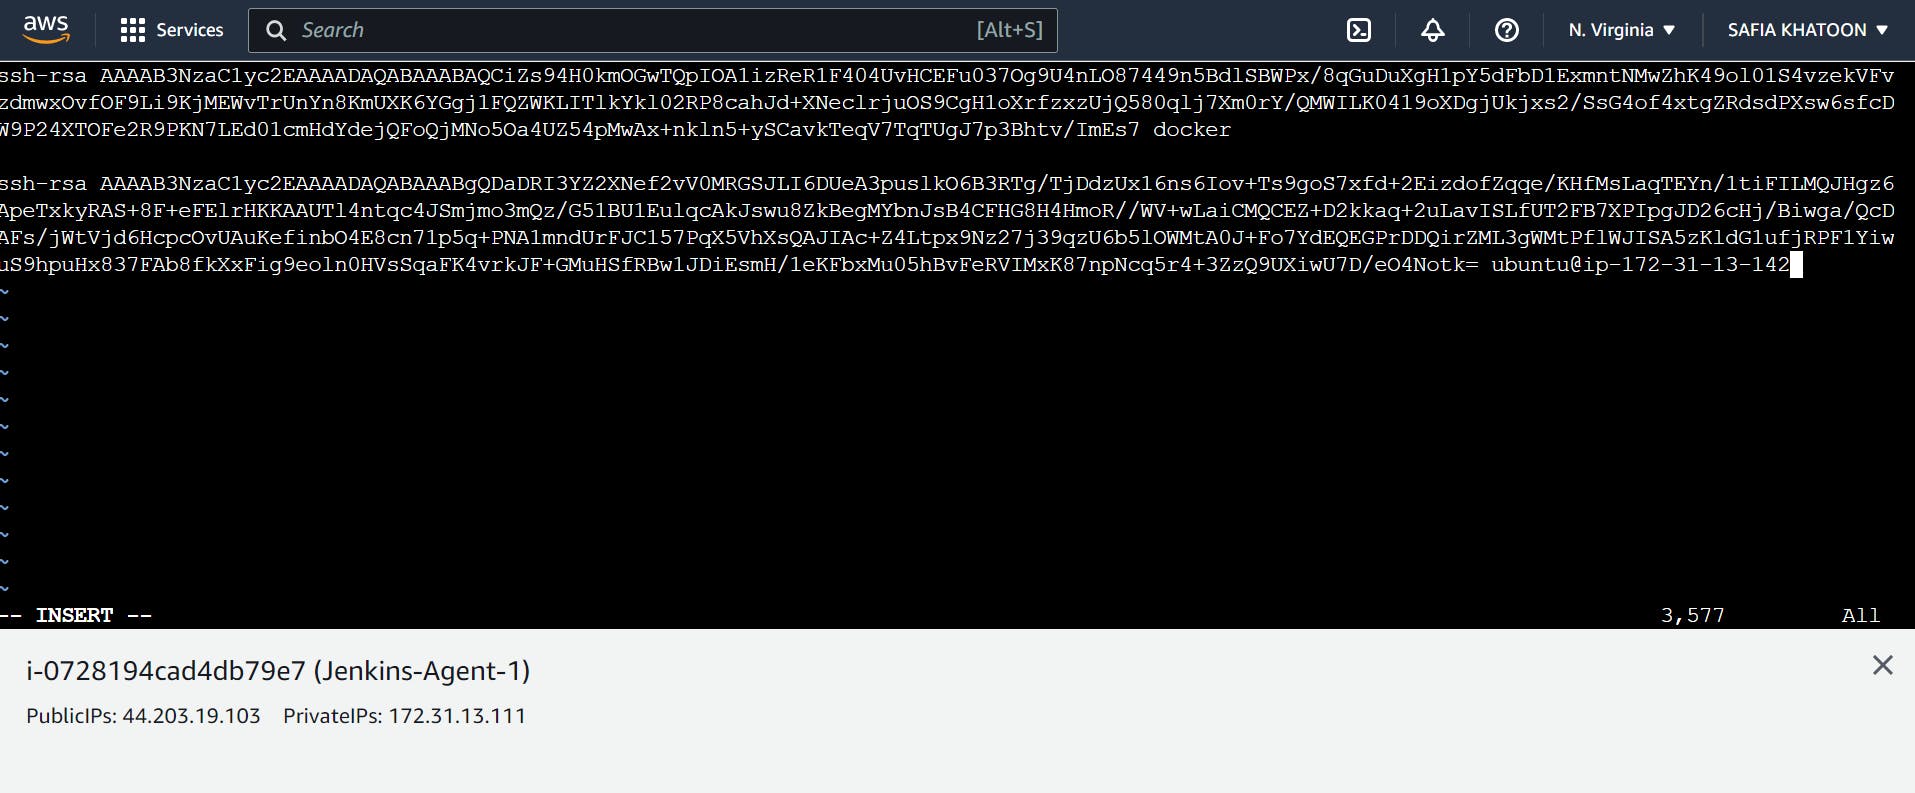

step 6
Go to Jenkins
Go to manage Jenkins
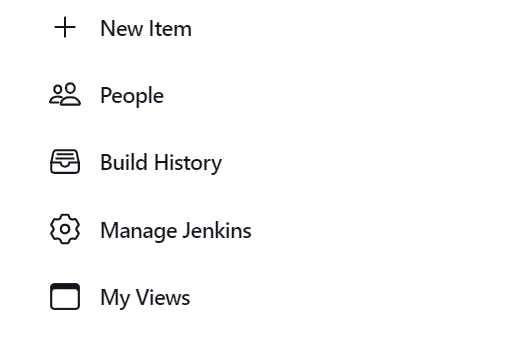
step 7
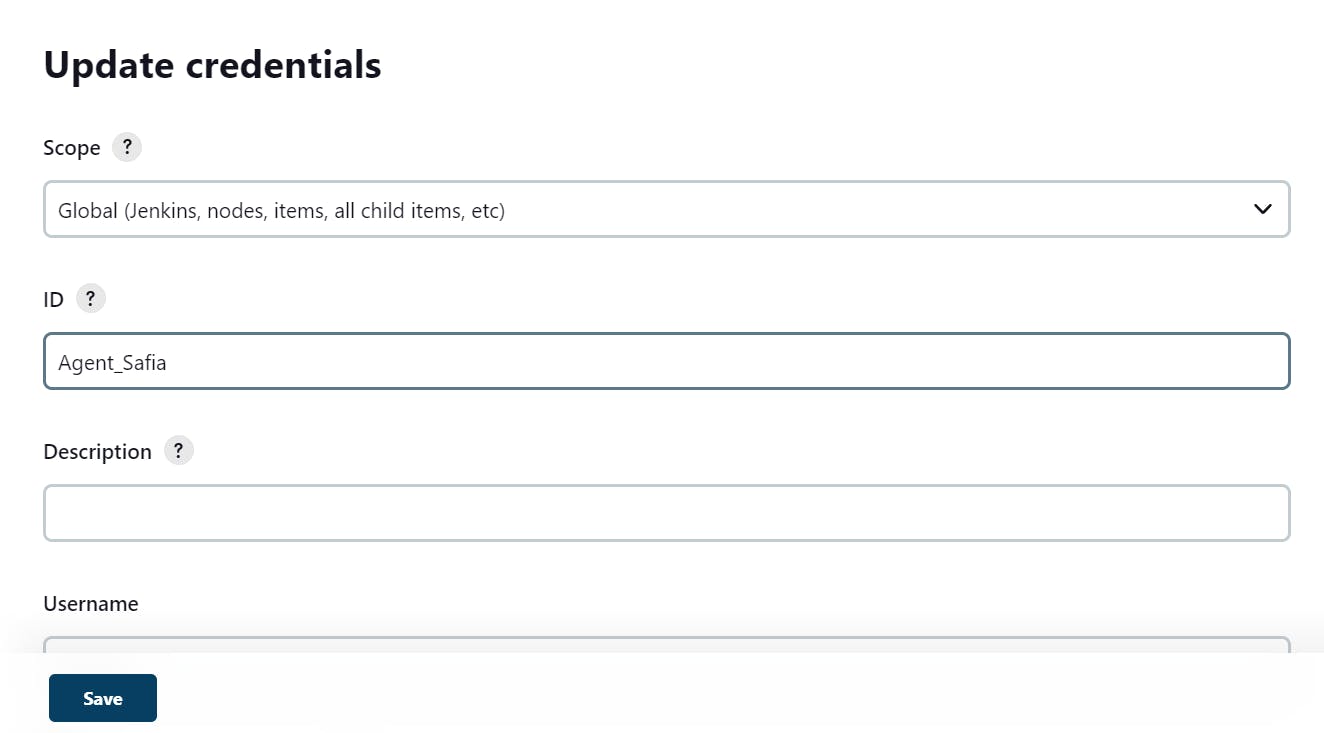
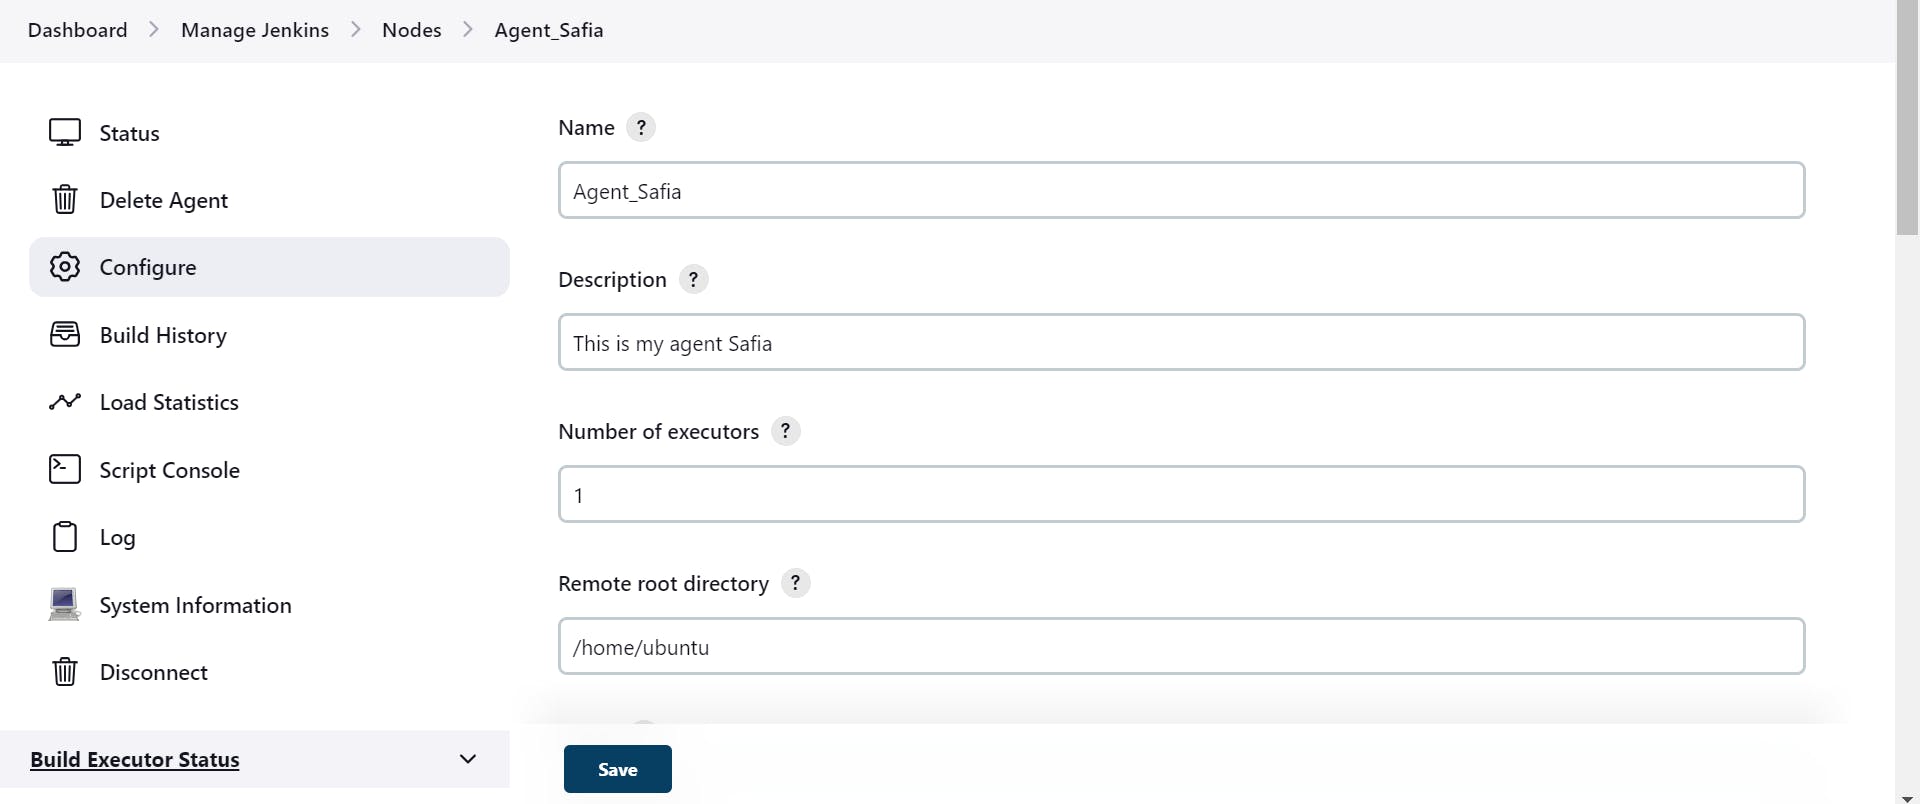
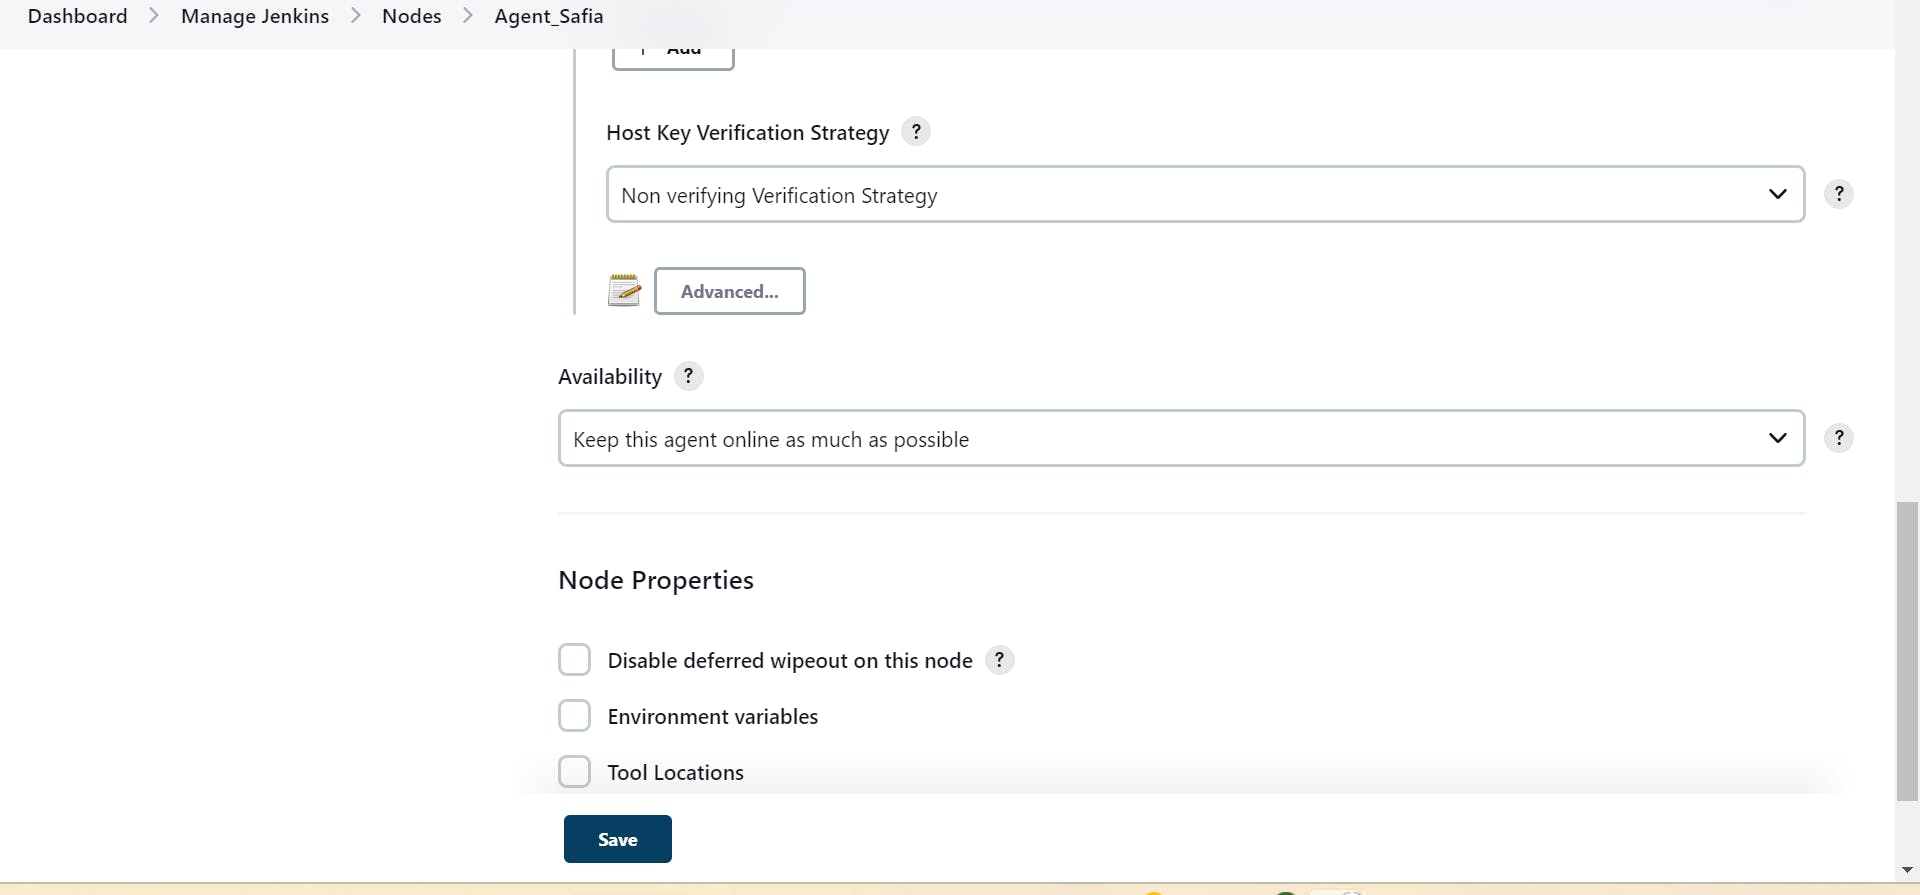
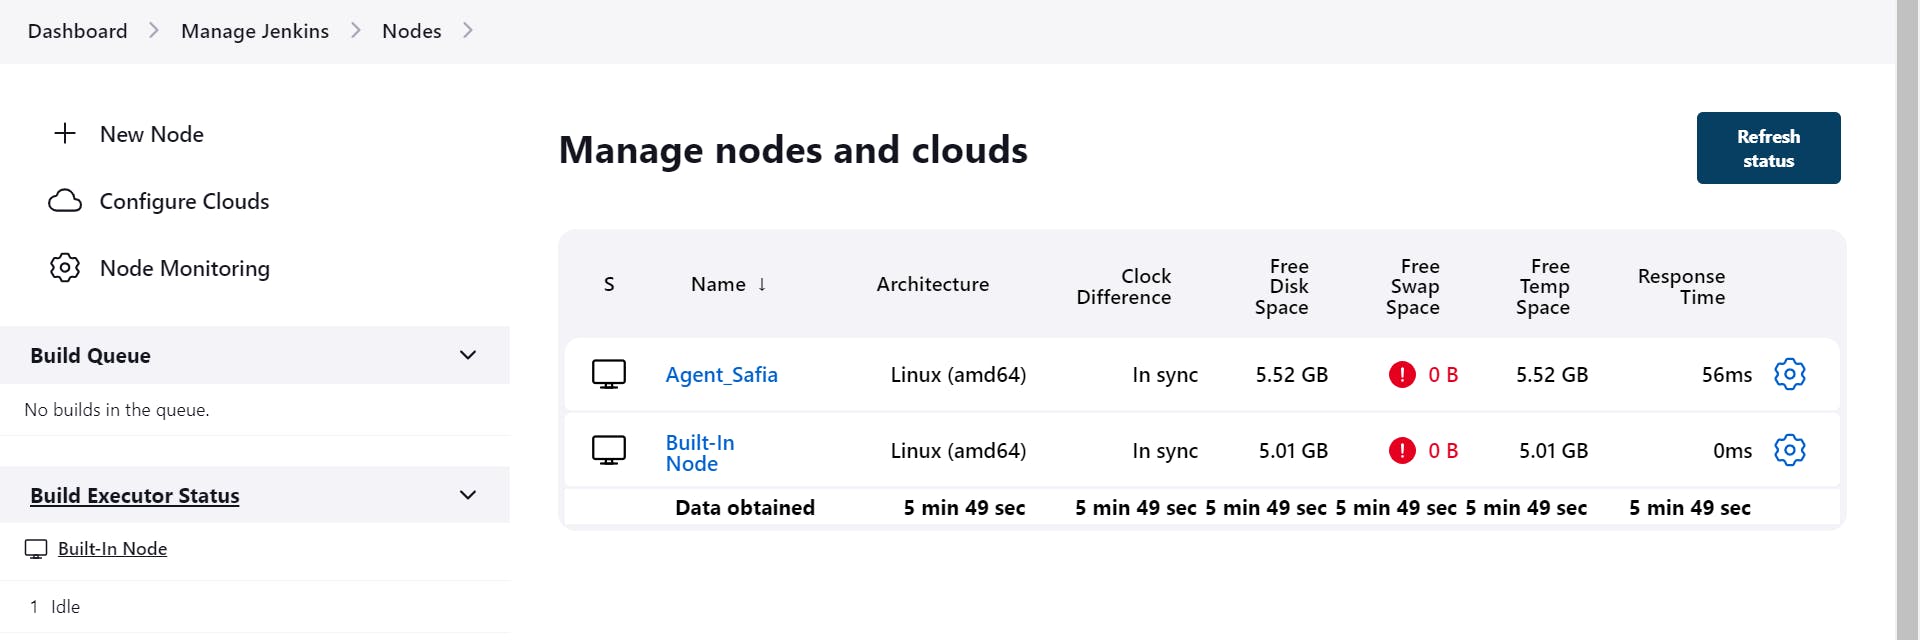
setup agent

create
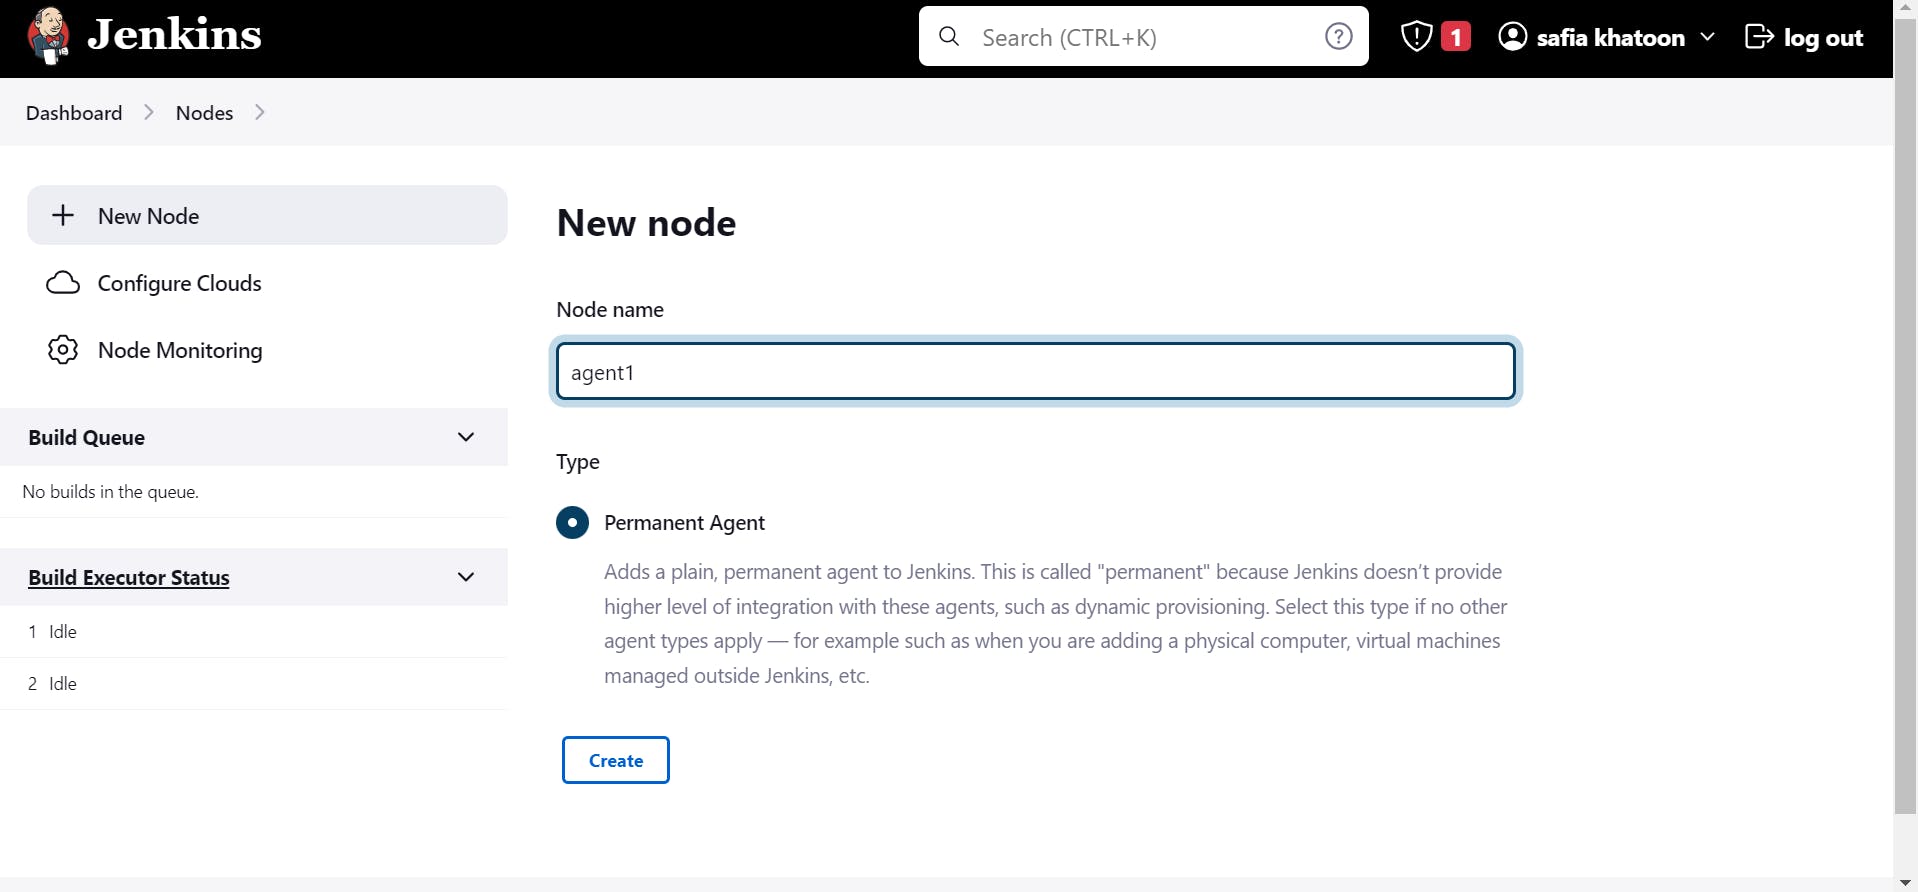
step -8
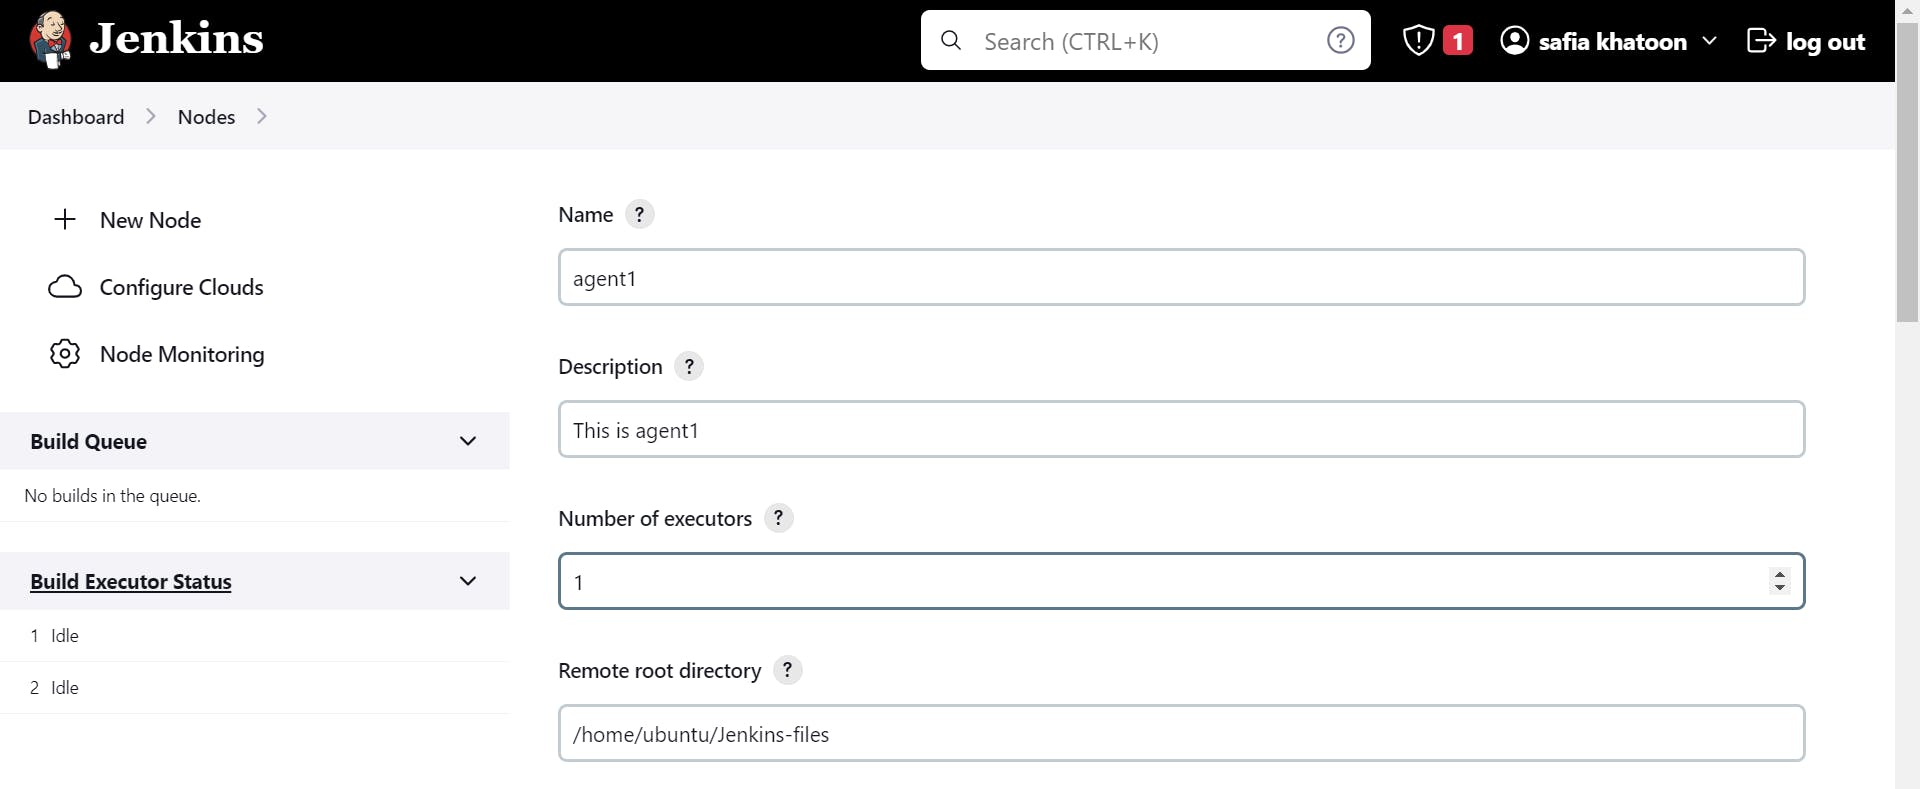
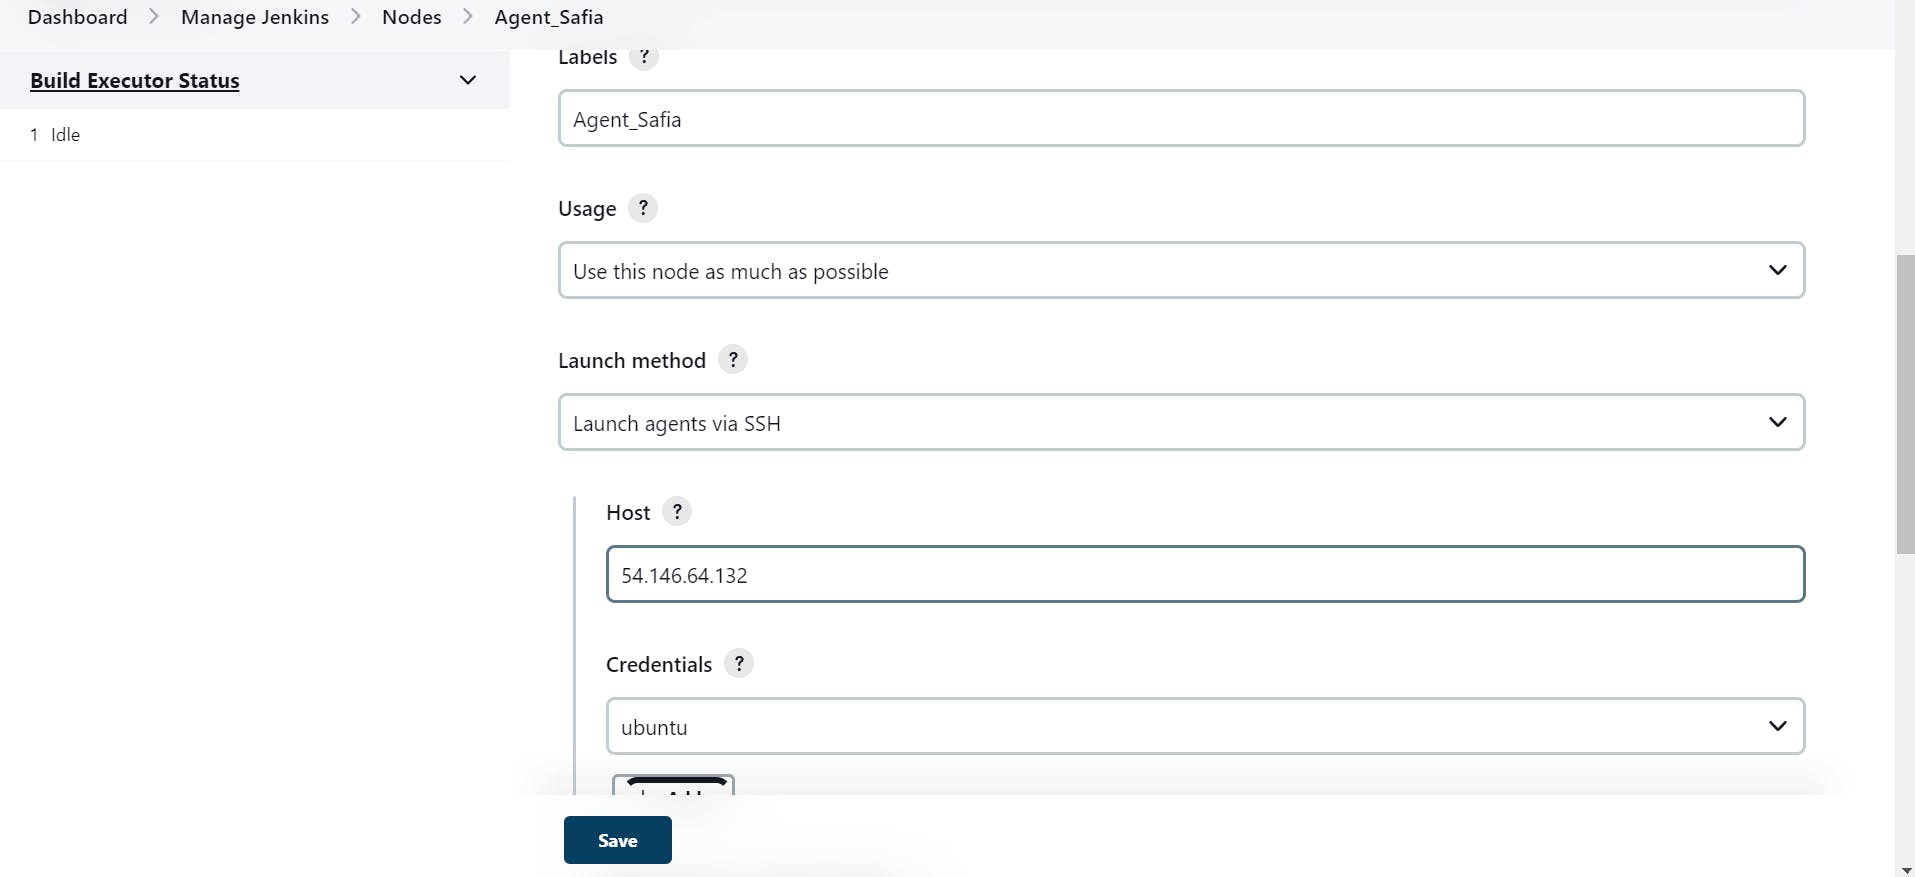
host Ip is your Agent-1 Public Ip
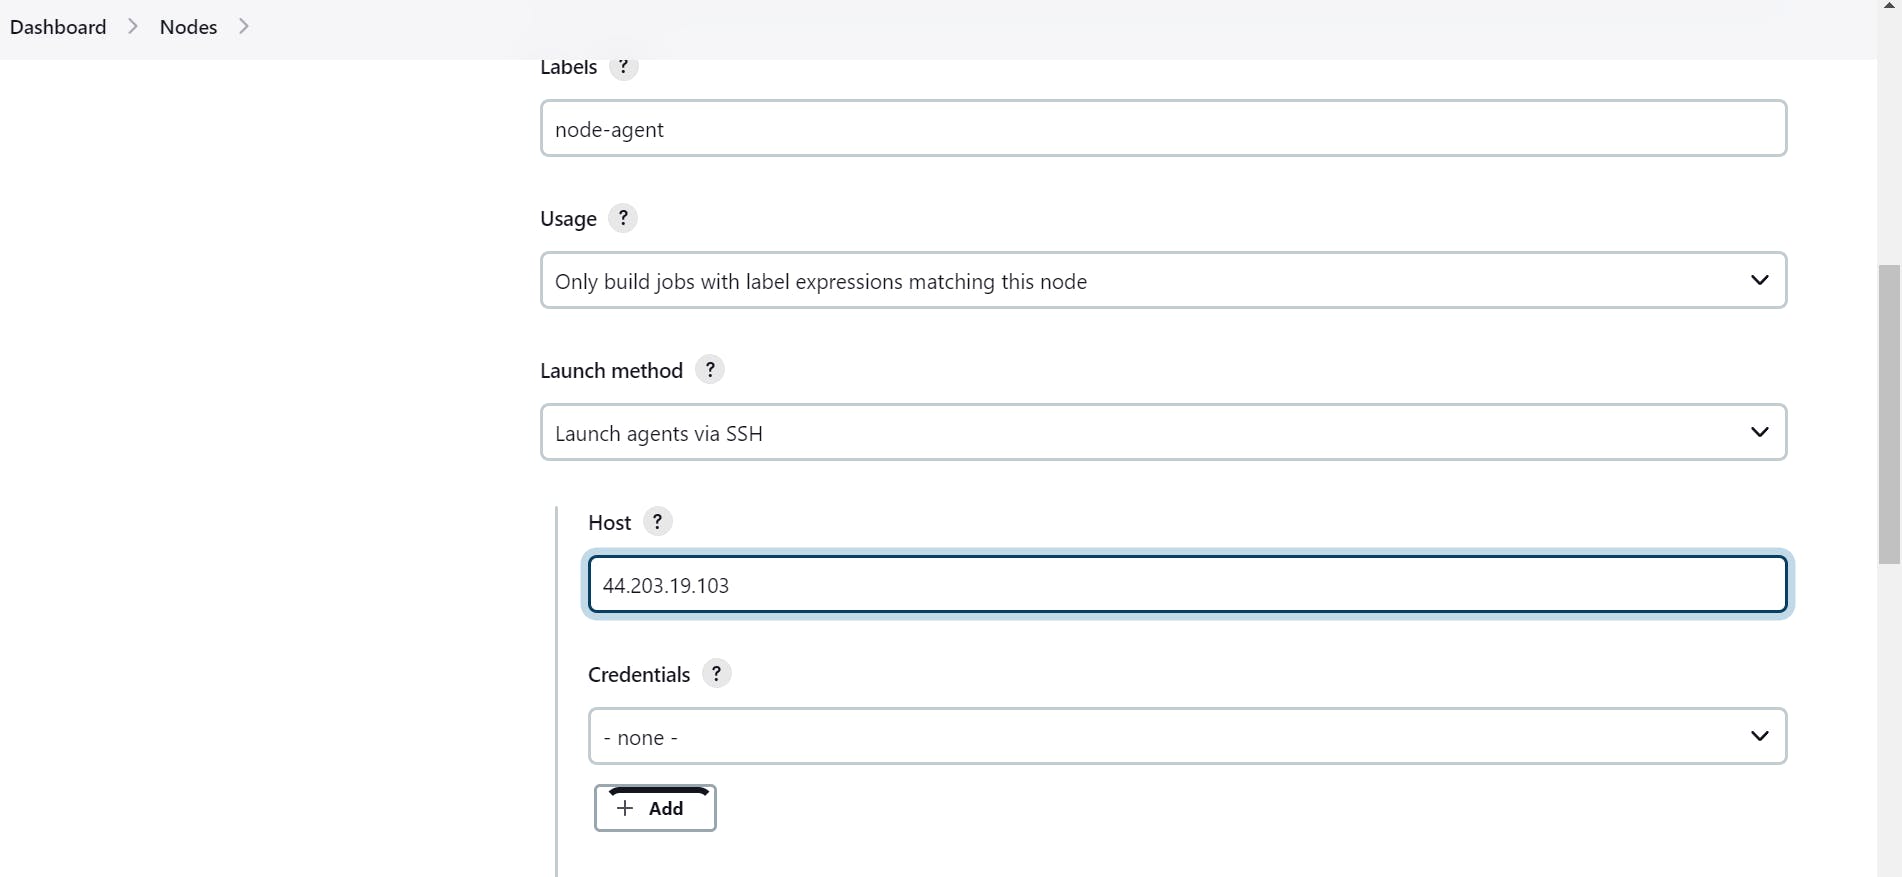
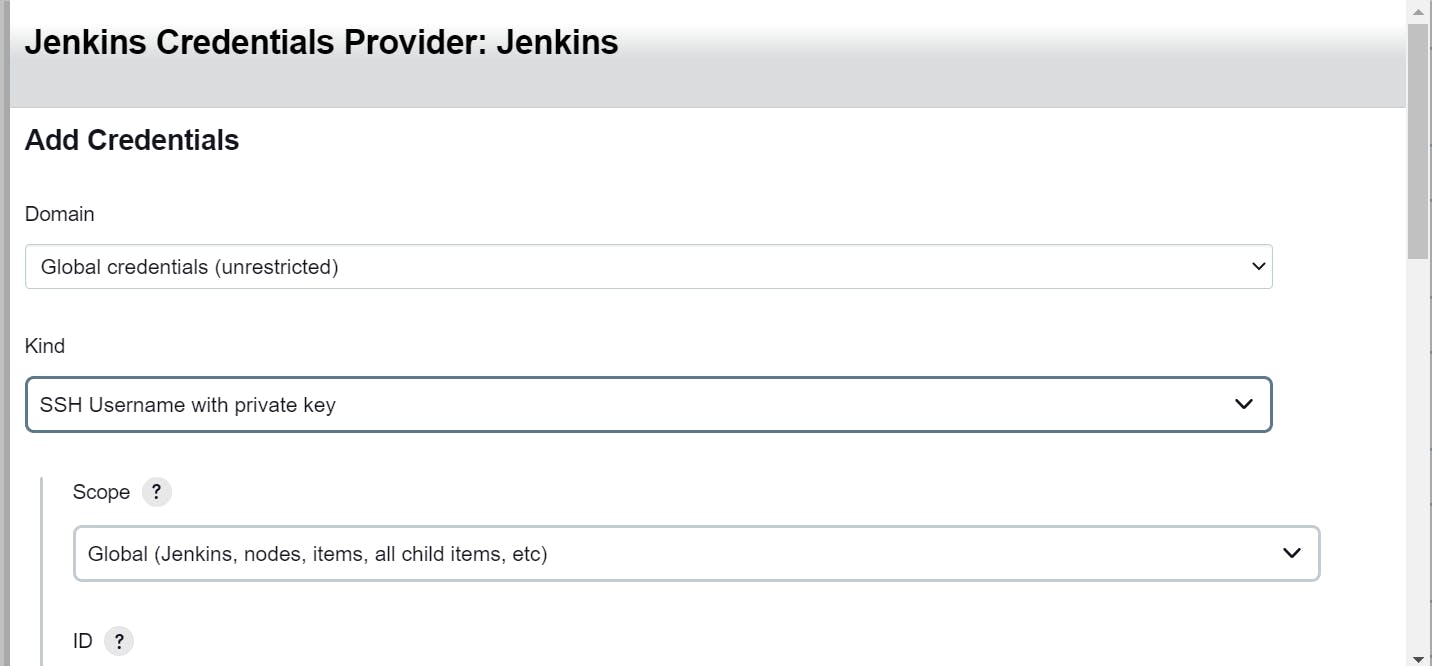
Click On Add
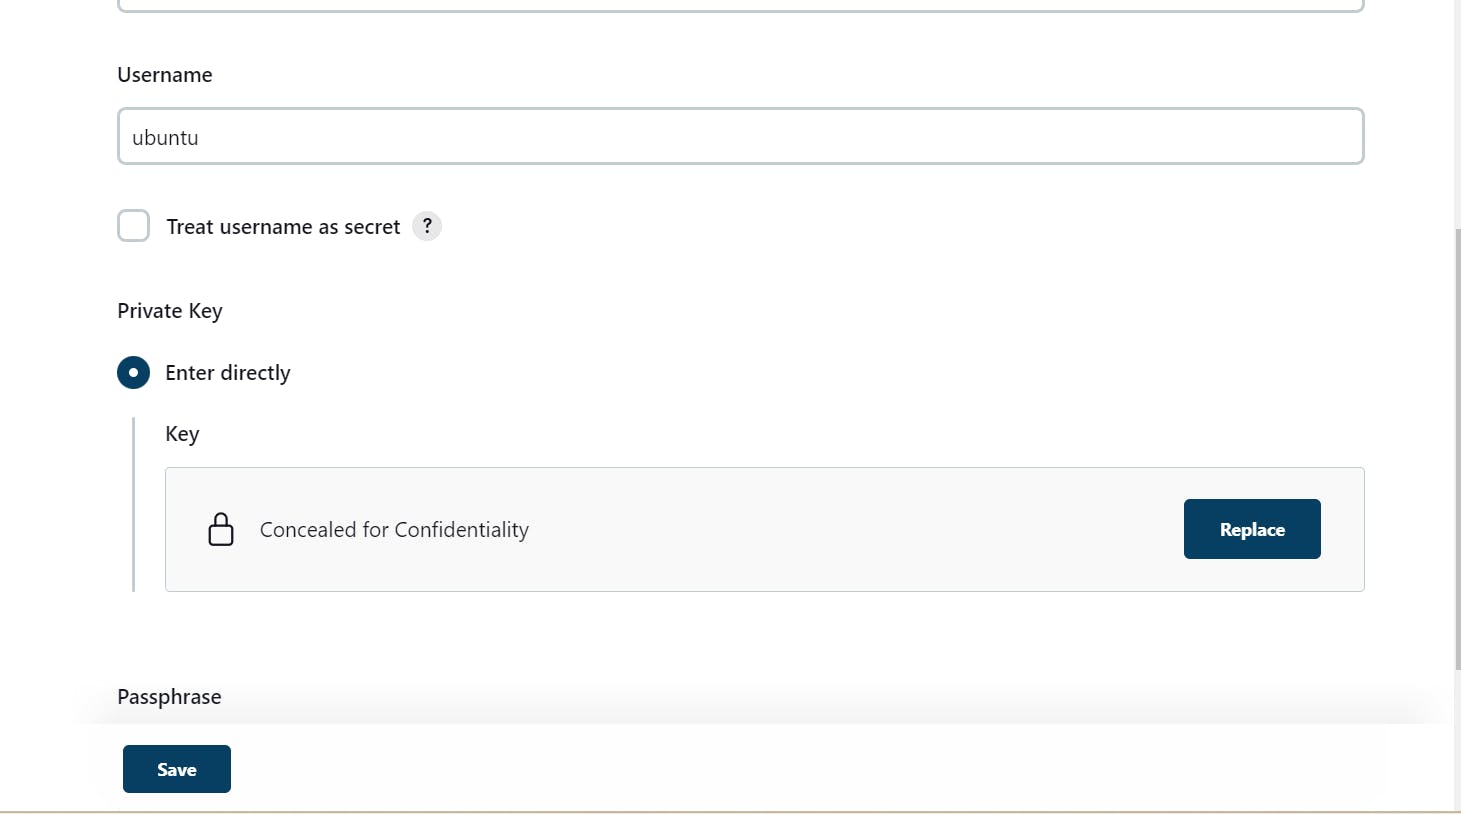
copy the private key

click on add

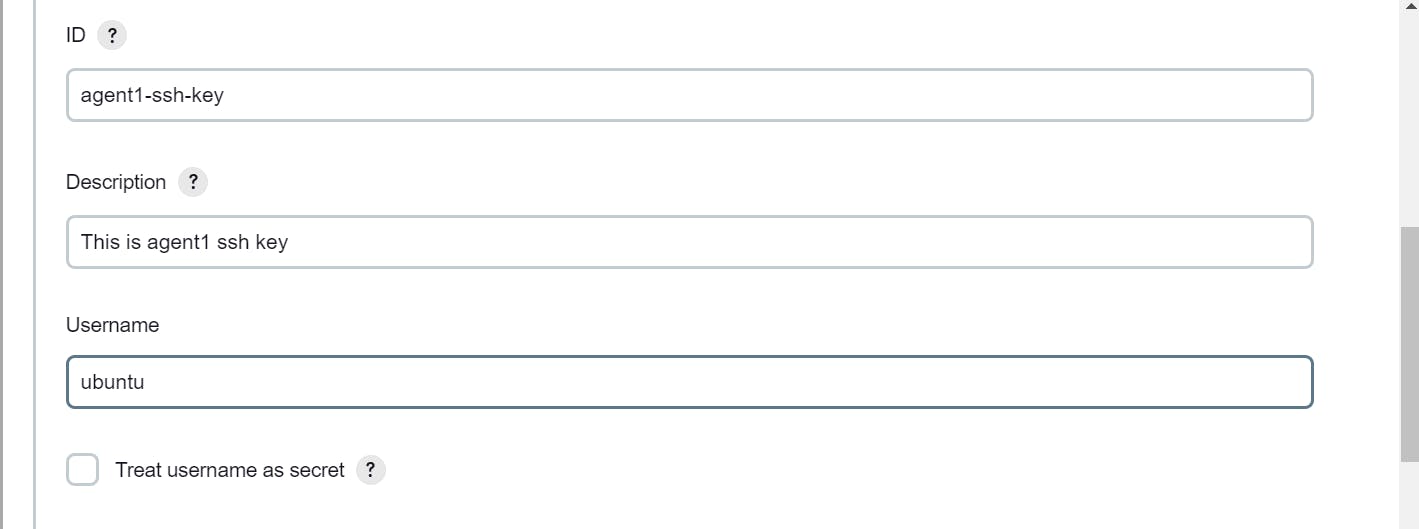
paste it here private key of your master and then add
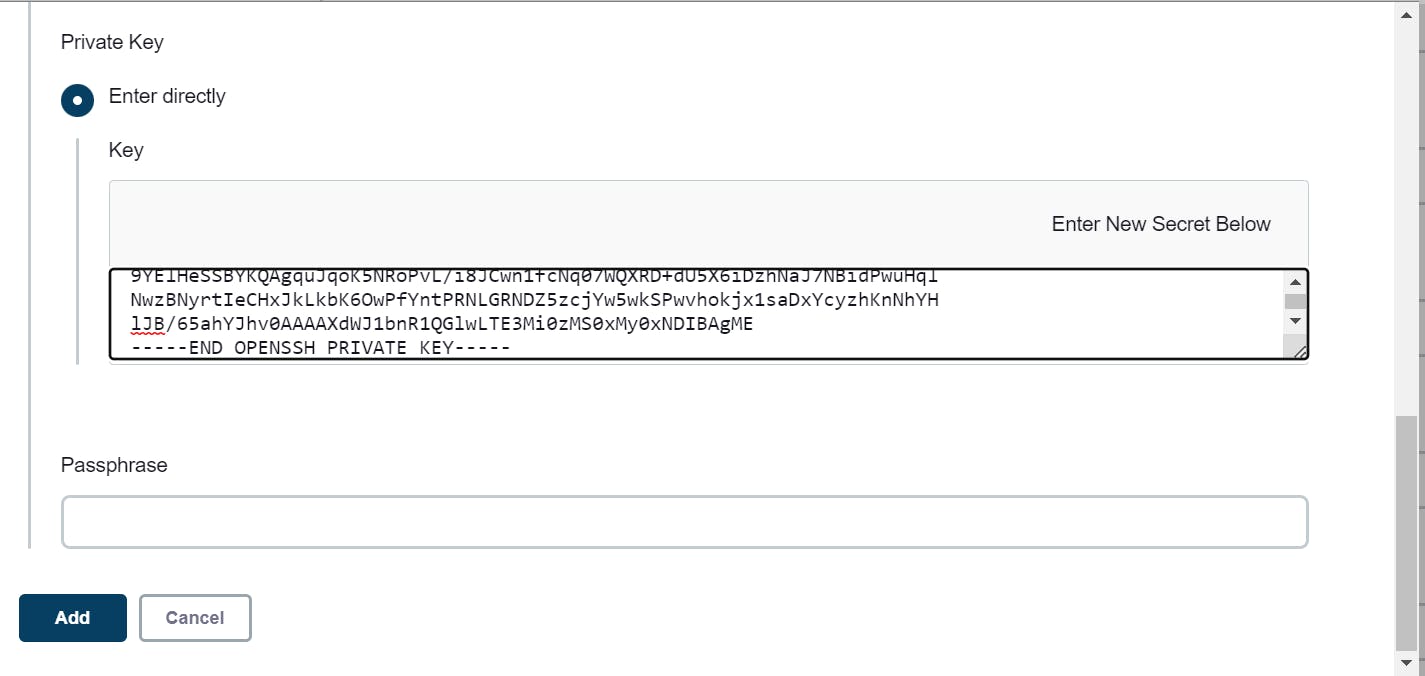
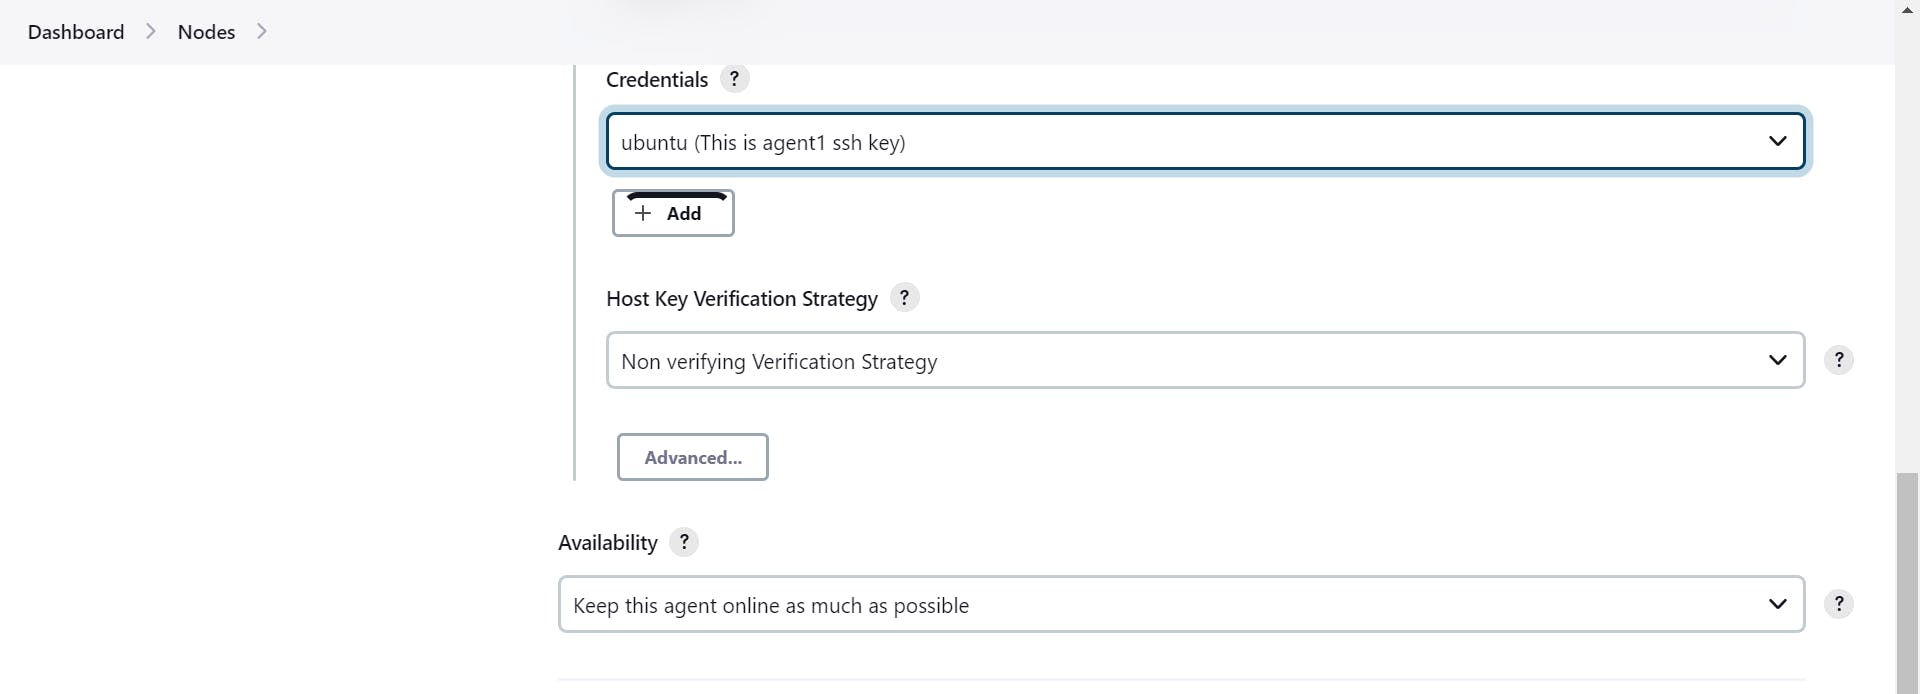
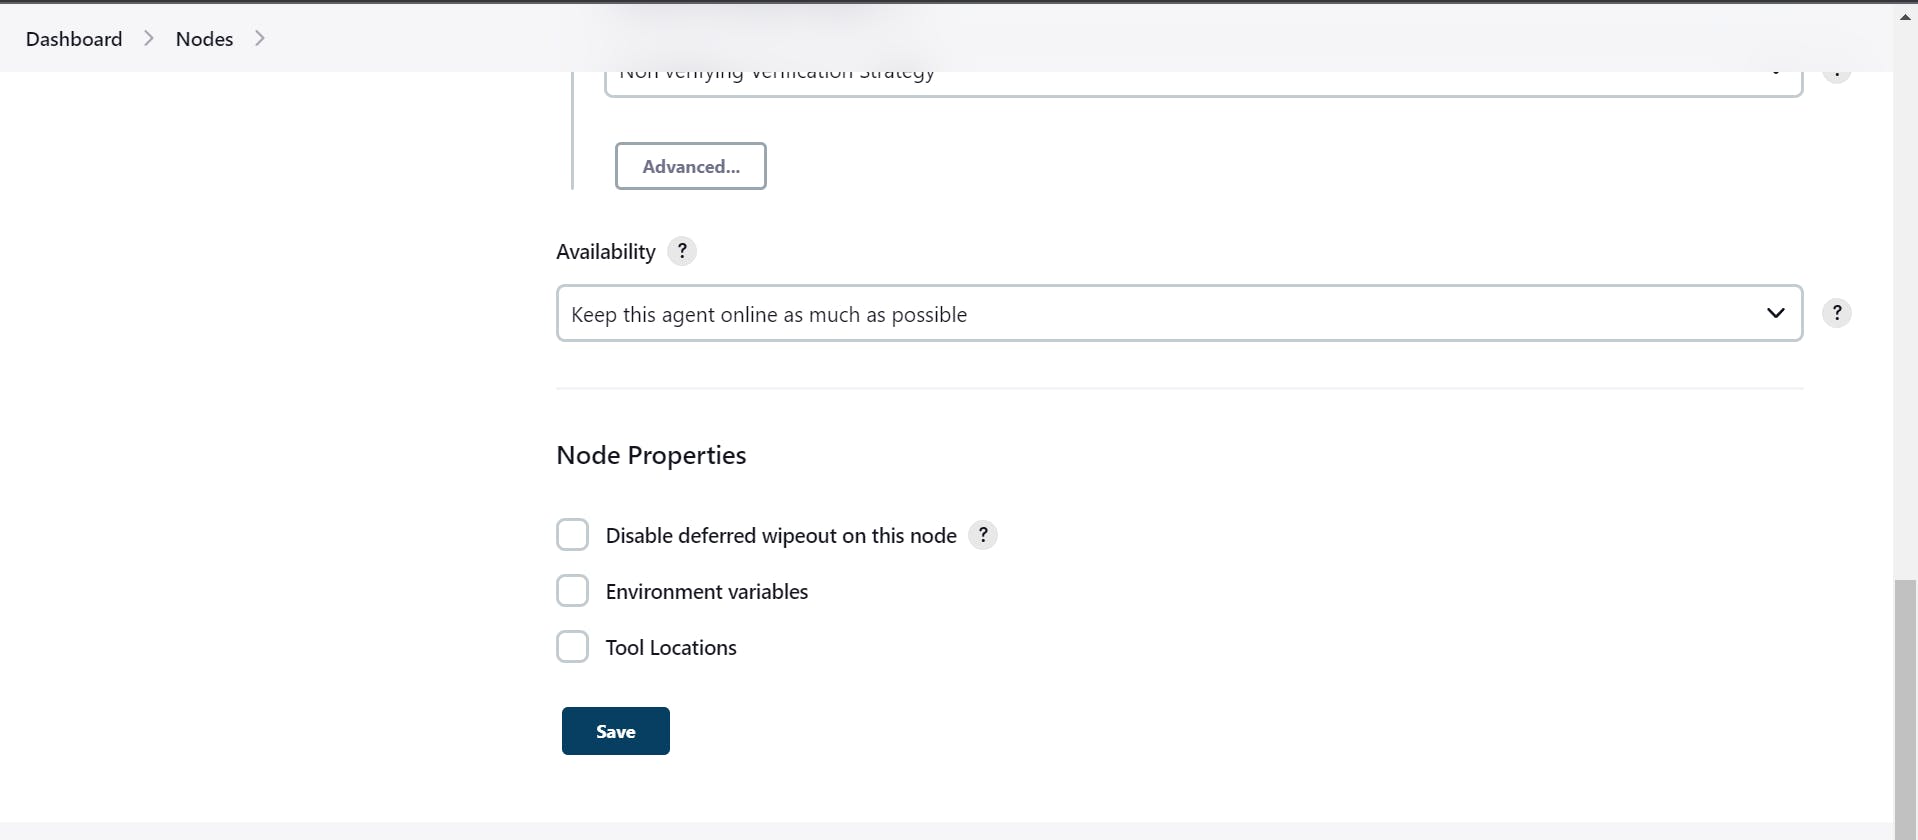
save
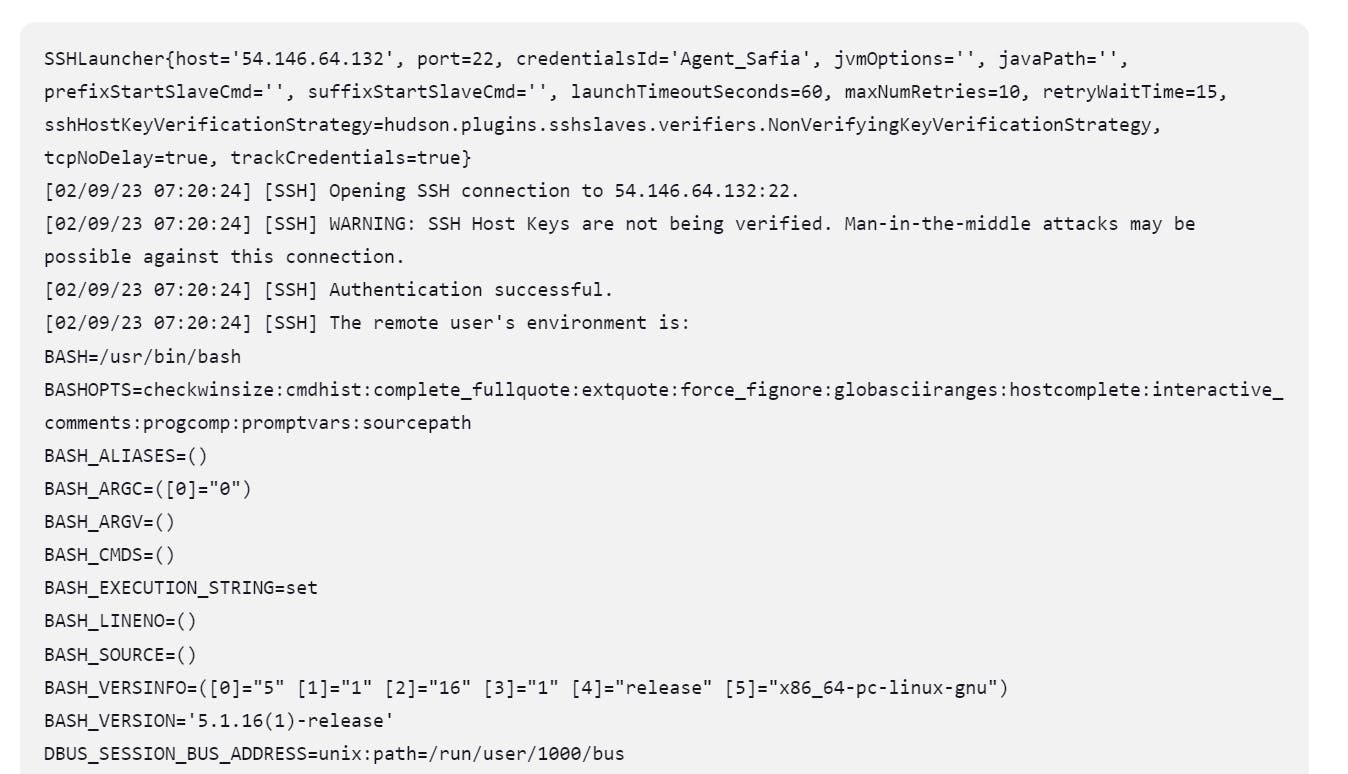
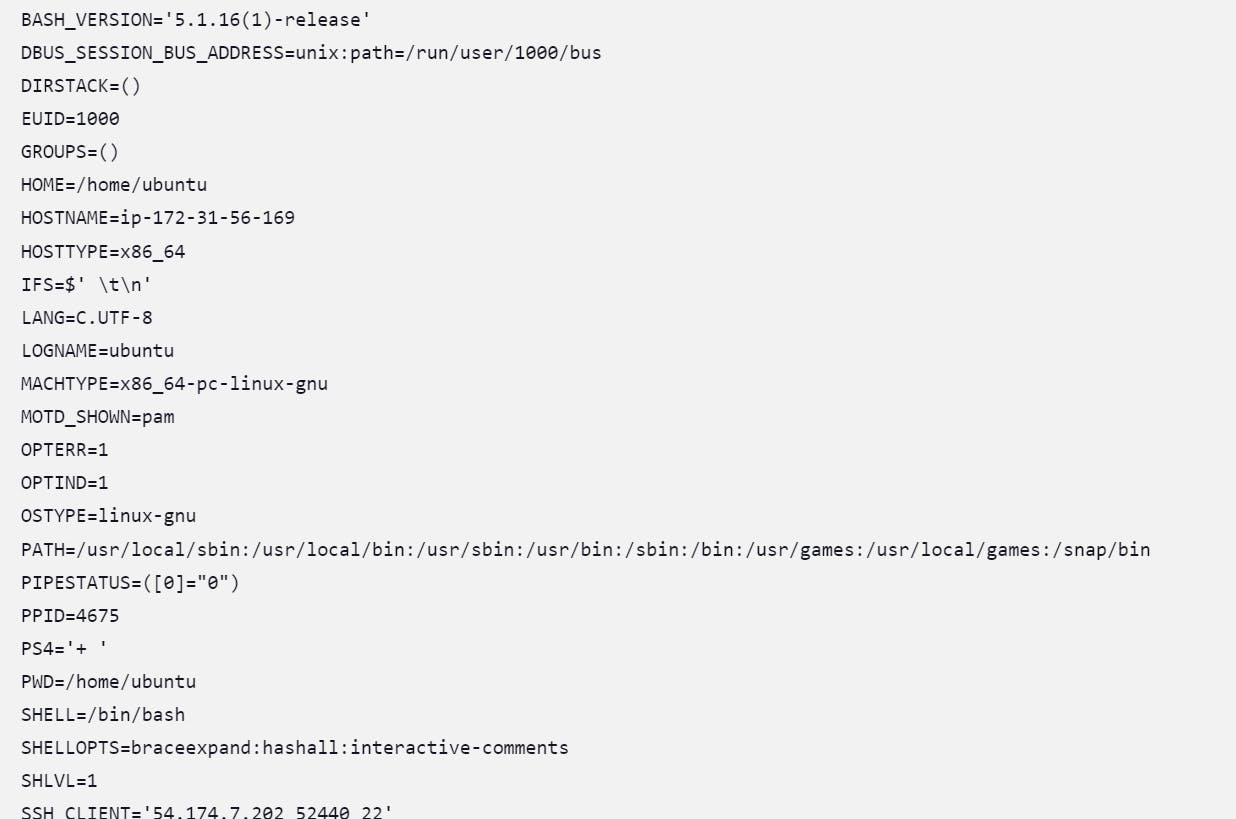
when you get this type of error then how to solve the error
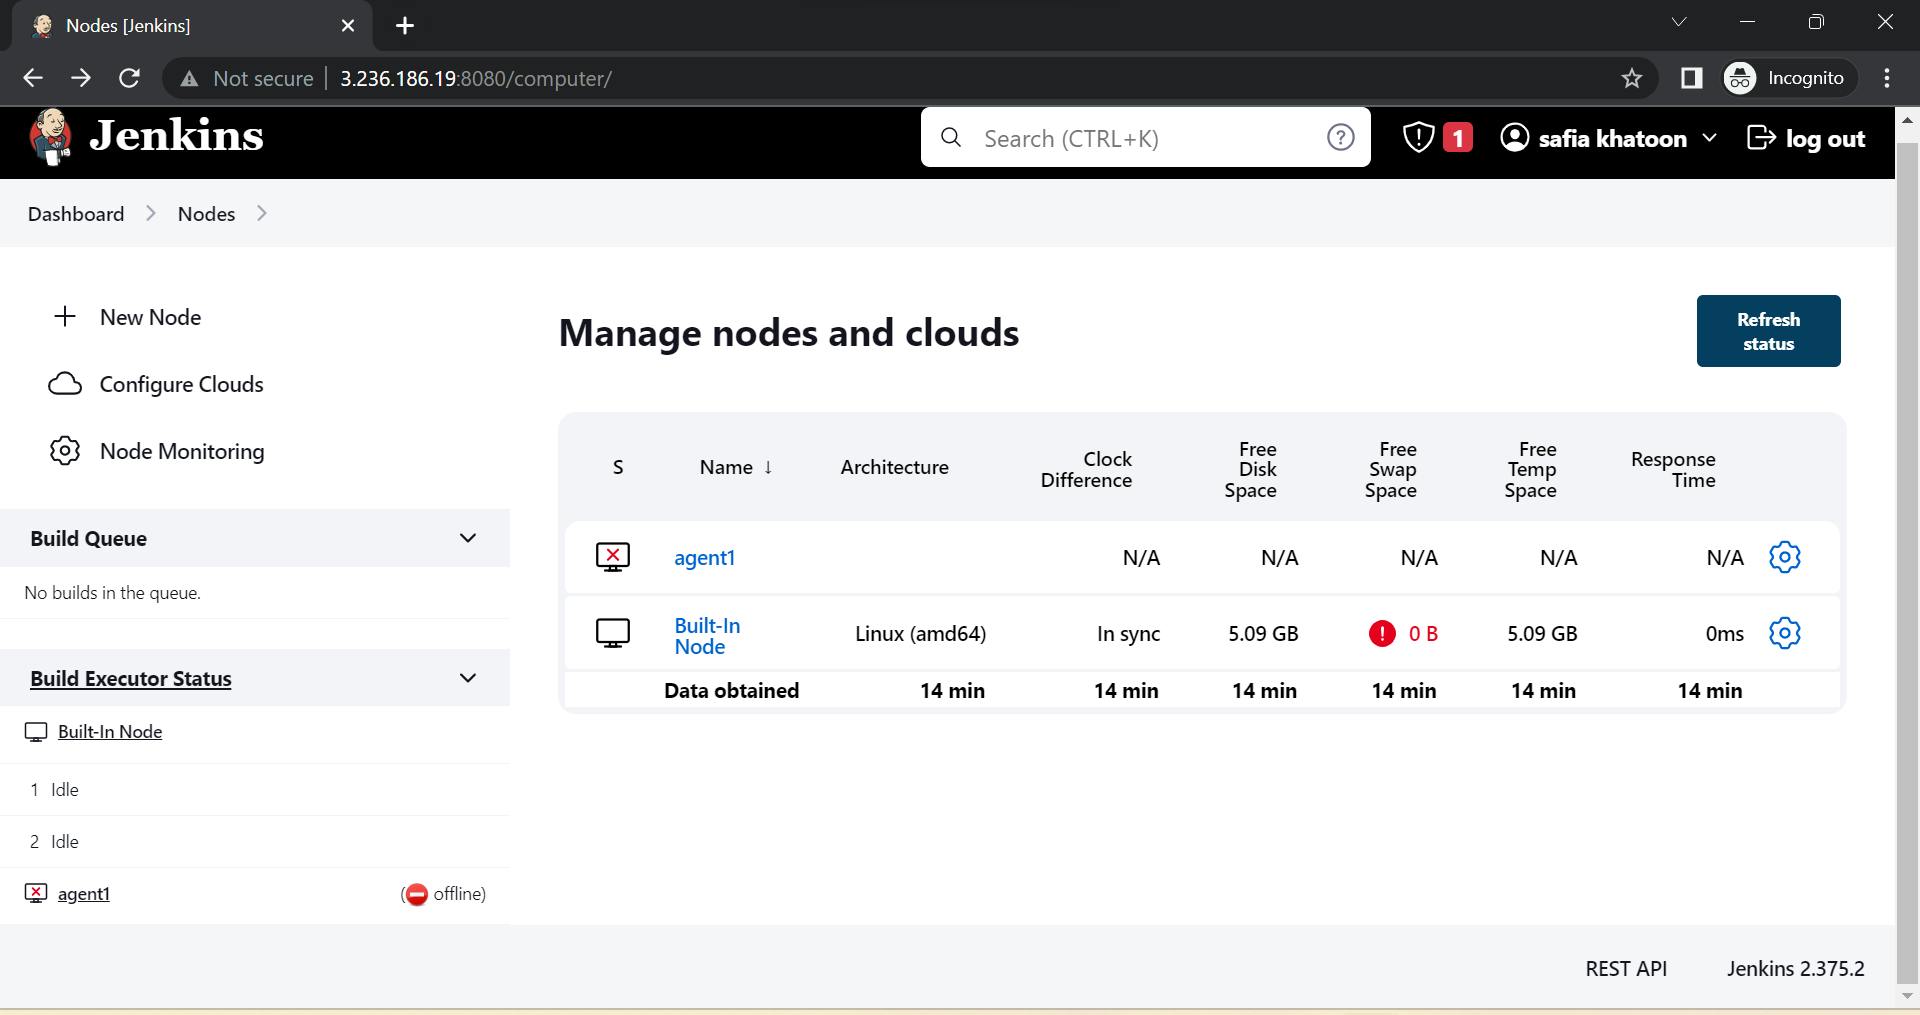
Solution:
you don't use connect ec2 instance
you always connect with the help of putty or PowerShell
Go to puttyGen
Go to Load
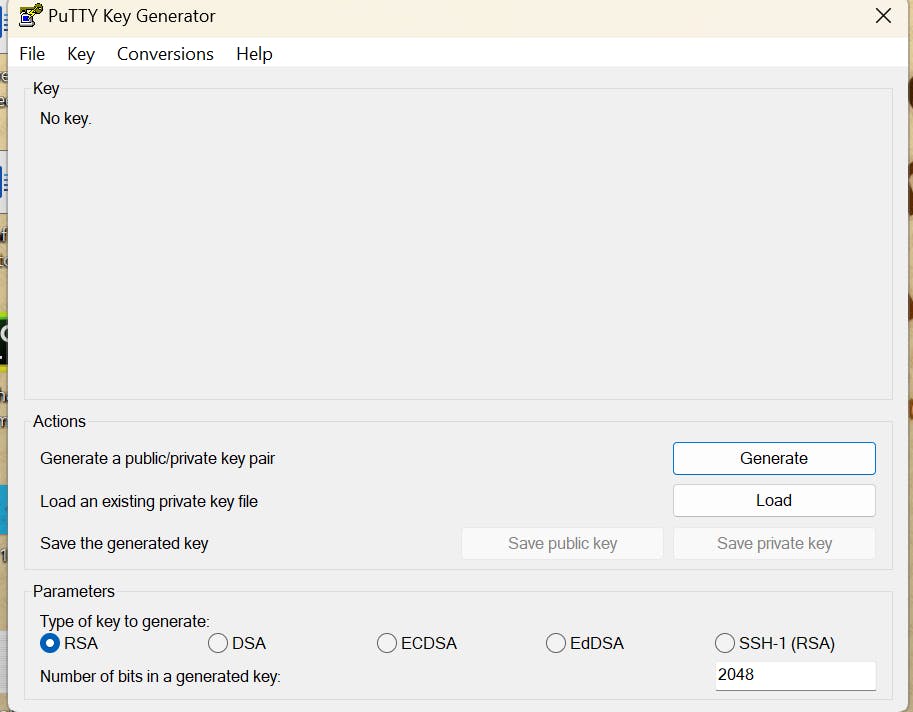
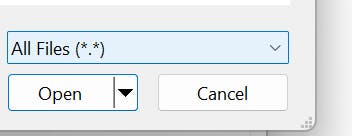

copy public IP:

Go to Putty:
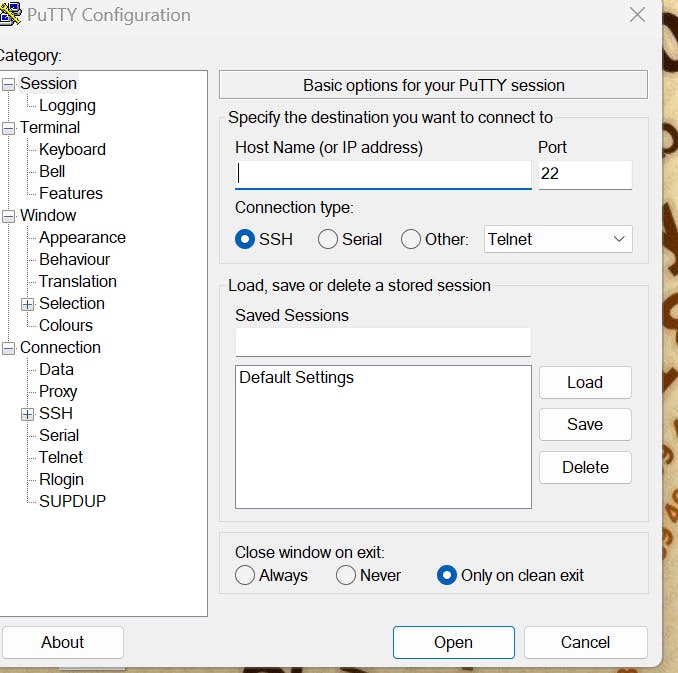
paste public ip
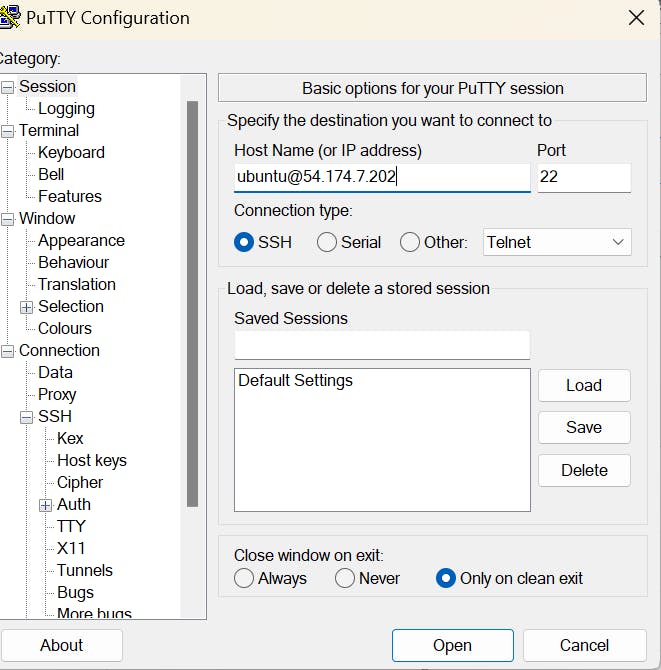
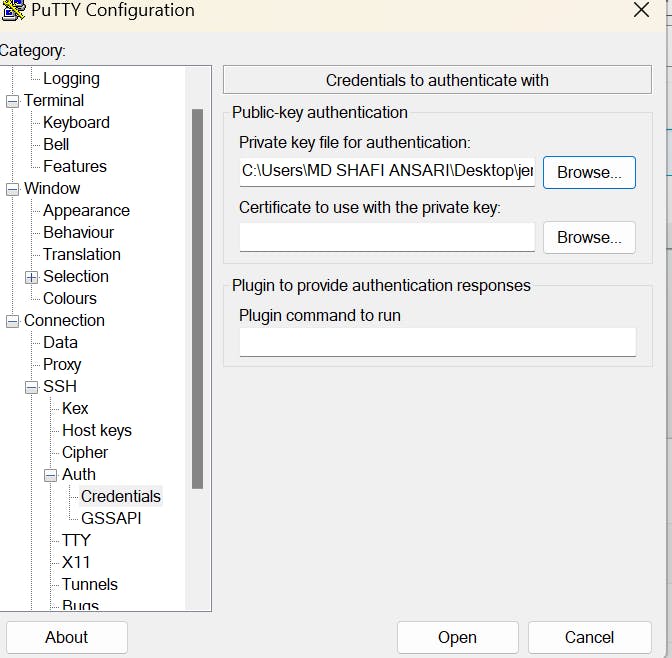
Go to ssh ---------------------Auth -------------------------------Credentials
and browse the key.

Go to global


