

upgrading the cluster:
Upgrading a Kubernetes cluster is an important task to ensure that your infrastructure is up to date with the latest features and security patches. Here's a step-by-step guide on how to upgrade your Kubernetes cluster:
Check the Kubernetes documentation: Before you begin the upgrade process, you should check the Kubernetes documentation to see the recommended upgrade path and any potential issues or changes that may arise during the upgrade.
Backup your cluster: It's important to create a backup of your cluster before upgrading, as this will allow you to easily revert back to the previous version if any issues arise during the upgrade process.
Upgrade kubectl: You should upgrade your kubectl command-line tool to the latest version to ensure compatibility with the new Kubernetes version.
Upgrade the control plane: You should upgrade the control plane components first, including the API server, etcd, and controller manager. You can use the kubeadm tool to upgrade the control plane, following the specific steps outlined in the Kubernetes documentation for your version.
Upgrade worker nodes: Once the control plane components have been upgraded, you can upgrade the worker nodes. This can be done using the same kubeadm tool, following the specific steps outlined in the Kubernetes documentation for your version.
Verify the upgrade: After upgrading, you should verify that all components are running correctly and that your applications are functioning as expected. You can use the kubectl command to check the status of your pods, services, and deployments.
Here's an example of upgrading a Kubernetes cluster using kubeadm:
Check the Kubernetes documentation to ensure you are using the recommended upgrade path for your version.
Create a backup of your cluster data and configurations.
Upgrade your kubectl tool to the latest version.
Upgrade the control plane components using the kubeadm tool:

Upgrade the worker nodes using the kubeadm tool:

Verify the upgrade by checking the status of your pods, services, and deployments:

By following these steps, you can upgrade your Kubernetes cluster to the latest version and ensure that your infrastructure is up to date with the latest features and security patches.
Backing up and restoring data:
Backing up and restoring data in Kubernetes is an essential task for ensuring the availability and continuity of your applications. Kubernetes provides several options for backing up and restoring data, including using persistent volumes and snapshots. Here's a step-by-step guide on how to back up and restore data in Kubernetes:
Backing up data:
Identify the data you want to back up: This could include databases, configuration files, and other critical data.
Determine the backup method: There are several backup methods available in Kubernetes, including using persistent volumes, taking snapshots, and using backup tools such as Velero.
Create a backup: Depending on the method you choose, you can use the kubectl command-line tool or backup tools such as Velero to create a backup of your data.
For example, to create a backup of a MySQL database using persistent volumes, you could create a YAML file with the following contents:
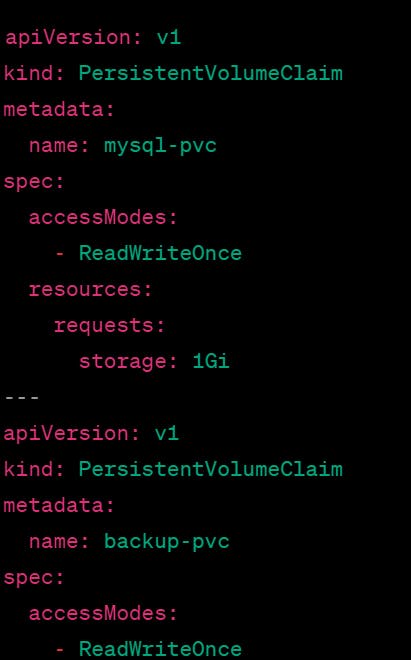
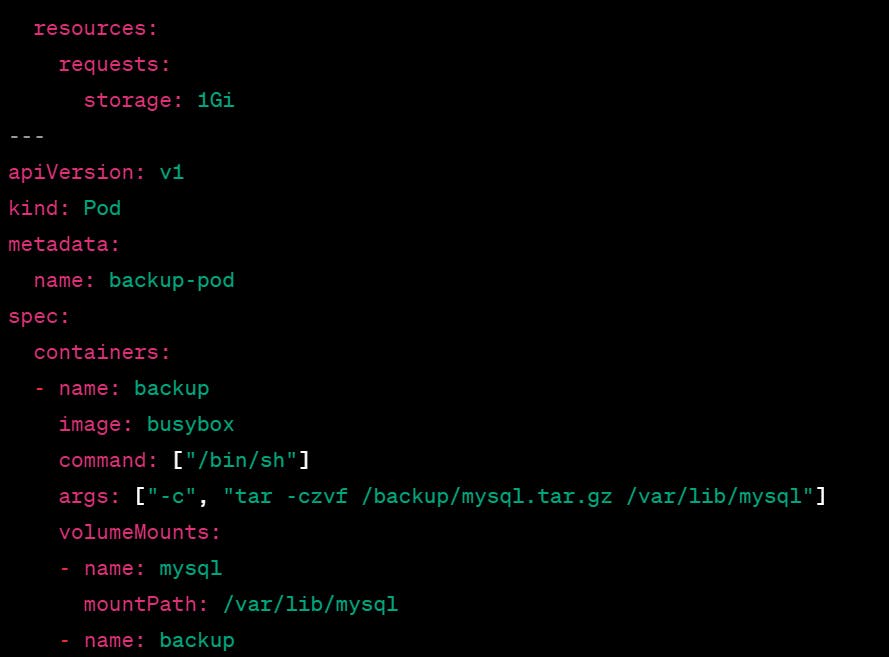

This YAML file creates a pod that mounts two persistent volumes, one for the MySQL data and one for the backup. The pod runs a command to create a tarball of the MySQL data and stores it in the backup volume.
Restoring data:
Identify the data you want to restore: This could include databases, configuration files, and other critical data.
Determine the restore method: Depending on how you backed up the data, you can restore it by recreating the persistent volumes, restoring the snapshot, or using backup tools such as Velero.
Restore the data: Depending on the method you choose, you can use the kubectl command-line tool or backup tools such as Velero to restore the data.
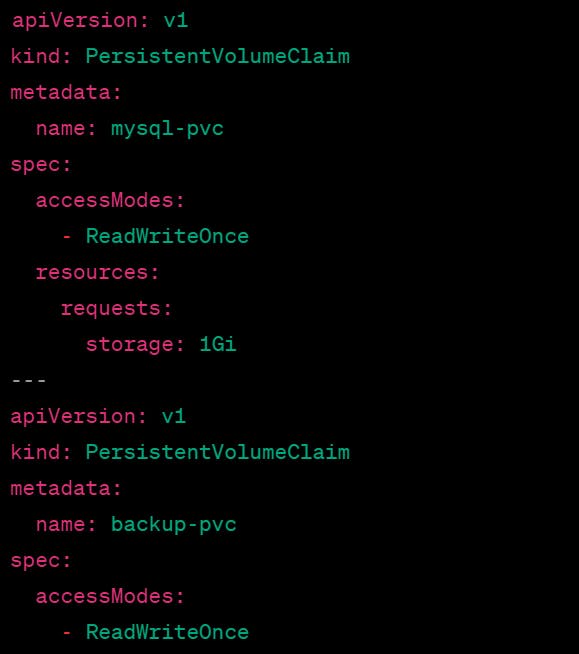
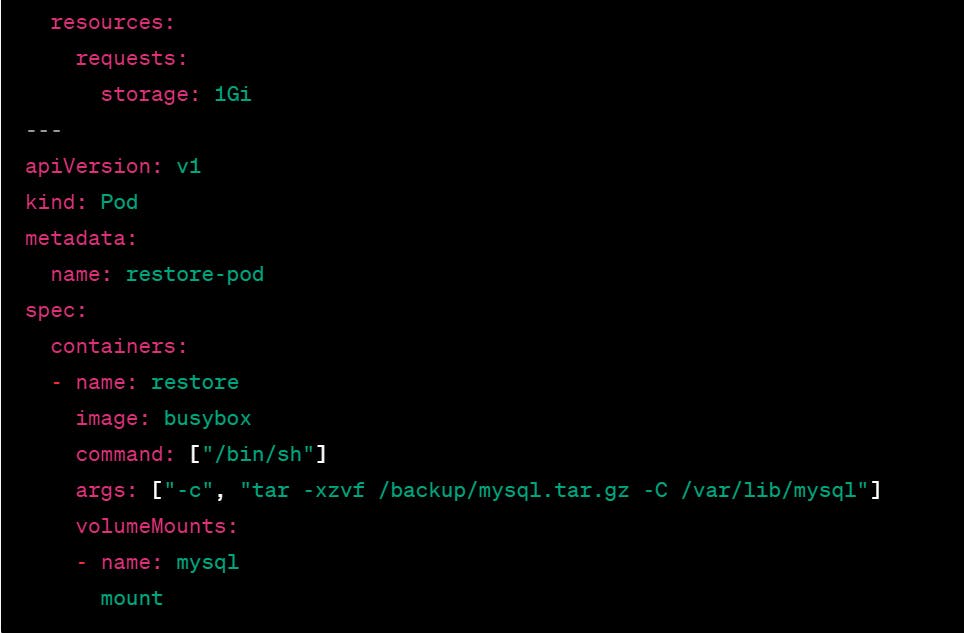
For example, to restore the MySQL database from the backup created above, you could create a YAML file with the following contents:
scaling cluster:
Scaling a Kubernetes cluster is a common task for ensuring high availability and performance of your applications. Kubernetes provides several options for scaling, including horizontal and vertical scaling. Here's a step-by-step guide on how to scale a Kubernetes cluster:
Horizontal scaling:
Identify the deployment or statefulset you want to scale: This could include your application pods, database replicas, or any other workload.
Determine the desired number of replicas: Depending on your application requirements, you can scale up or down the number of replicas.
Update the deployment or statefulset: You can use the
kubectl scalecommand to update the number of replicas.
For example, to scale up a deployment named my-app to 5 replicas, you can use the following command:

Vertical scaling:
Identify the deployment or statefulset you want to scale: This could include your application pods, database replicas, or any other workload.
Determine the desired resource limits: Depending on your application requirements, you can adjust the resource limits for CPU, memory, and other resources.
Update the deployment or statefulset: You can use the
kubectl editcommand to update the resource limits.
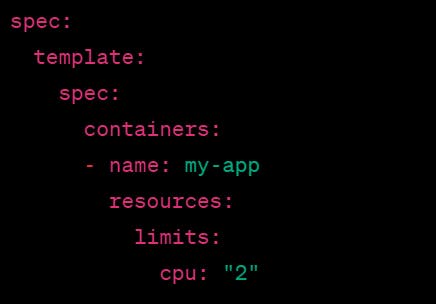
For example, to increase the CPU limit for a deployment named my-app to 2 CPU cores, you can use the following command:

This will open the deployment YAML file in an editor. You can then update the resources section to include the desired CPU limit:
Thank you for reading this blog🙏
I hope it helps 💕
— Safia Khatoon
Happy Learning 😊